Working with Projects, Max For Live Devices, and Standalones
Node for Max and Projects
Projects are a great way to organize and structure your work in Max. In any situation where the patching you’re doing includes lots of different resources (patchers, samples, and data files), a project can be especially useful.
You can include Node resources in Max projects, as well. If you wish. If you want to export content from your Max patching for frozen Max for Live Devices, Standalone applications, or Max Collectives, it will be necessary to do so.
Node and Max can sometimes disagree about how folders should be organized. When you work with Node resources in the context of a Max project, you should follow these best practices:
- Make sure to disable “Keep Project Folder Organized”. If you do not do this, Max will try to move JSON resources into a “data” directory, and to move all .js resources into a “code” directory.
- Give your JavaScript resources unique names. While it is tempting and common to call a JavaScript file something like index.js, this can cause conflicts due to the flat path structure that Max uses if there are multiple files called index.js elsewhere in Max’s search path. If Max detects such an issue, you’ll see a warning in the Max console.
Exporting a Standalones and M4L Devices with Node for Max
Node for Max supports bundling dependencies (aka the node_modules folder) within Collectives, Standalone Applications and Max For Live Devices. The following sections are showcasing how to do it while assuming that we are working with a project called N4M-Bundler.
1/ Creating the Project
We start off by opening Max and creating a new Project using the
File Menu called N4M-Bundler. In return Max will show us the Project
Window, which can be used to organize the project’s files and contents.
Since we don’t want Max to try to organize contents automatically, the
first thing we’ll do is disable the “Keep Project Folder Organized” option
in the Project Inspector.
To open the Project Inspector use the Project Settings Menu:

In the Project Inspector disable the option "Keep Project Folder Organized":

You can now close the Project Inspector. We will now use the + Button
in the bottom left corner in order to add our main patcher to the project
by choosing "Add New File…" and creating a Max Patcher called n4m-bundler.main.maxpat
In order to verify what just happened we can use the Finder (Mac) / File Explorer (Windows)
and look at the N4M-Bundler folder in the user’s Documents/Max 8/Projects folder.
It should now contain a folder called patchers that includes our freshly created
n4m-bundler.main.maxpat patcher.
In order to have a place to organize our content for node.script we will also
create a folder called node_content next to the patchers folder. Our folder
should look something like this:
N4M-Bundler/
├── patchers/
│ └── n4m-bundler.main.maxpat
└── node_content/
2/ Adding node_content to the Project’s Search Path
In order make the files in our node_content folder available to the project we
need to add it to the project’s Search Path. For that click on the Gear Icon in
the Project Window and use choose the "Search Paths" option. Max will open another
window that allows you to manage the Project's Search Paths.
Using the + Icon at the bottom left of this window we can add another entry, which
should give you something like the following:

Now click the Choose Button in that new line and add the node_content folder we
created previously. After that you can rename the entry to Node Content but most
importantly you have to enable the “Embedded” option. Your Project's Search Path
Window should now look similar to this:

3/ Creating the Node.js script
We will now create the simple script for this test scenario. For that open the node_content folder in a text editor of your choice and create a file called n4m-bundler.js with the following content:
const Chance = require("chance")
const maxAPI = require("max-api")
const chance = new Chance()

const generateRandomName = async () => {
  const name = chance.name()
  await maxAPI.outlet(name)
}

setInterval(generateRandomName, 1000)
4/ Patching everything together and installing the chance module
We will now edit our Project’s main patcher and install the required chance
package from NPM. The simple idea is to show the random name in a comment box.
Start off by create a node.script instance pointing to our n4m-bundler.js file.
Before we do anything else we will install the chance
package by sending a message to the node.script object:

Once done you should find a node_modules folder and a package-lock.json in the node_content
folder and can remove the message from the patcher. If you like, you can use Finder or
File Explorer again to verify that your project directory looks something like this:
N4M-Bundler/
├── patchers/
│ └── n4m-bundler.main.maxpat
└── node_content/
│ └── node_modules/
│ │ └── chance/
│ │ └── *** a whole bunch of files ***
│ └── n4m-bundler.js
│ └── package-lock.json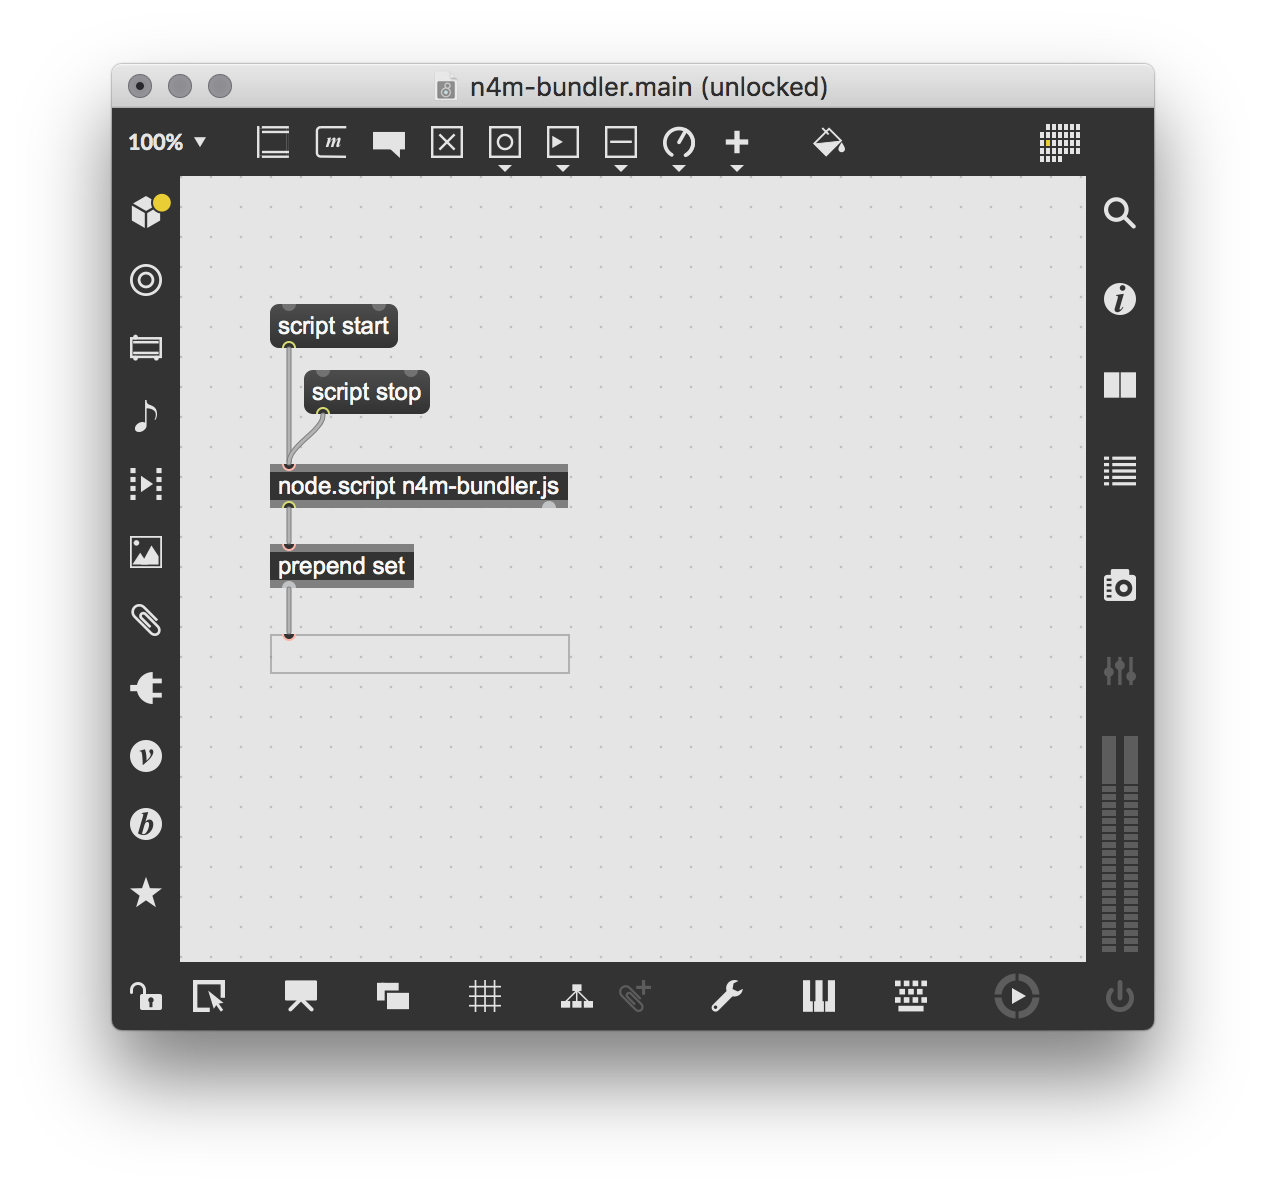
Clicking the message should start the script and show a random name in the comment box every second. You can now stop the node.script using .
5/ Bundling
We have now all the pieces of the puzzle at hand and can build our project.
Choose “Build Application” from the File Menu, make sure the Format is set to
Application and proceed. Max should now build a Standalone application containing
our Patch, Script but also the chance module as a dependency.
The same would be true if we attempt to build either a Collective or a Max For Live Device.
See Also
| Name | Description |
|---|---|
| Node for Max Documentation - Table of Contents | Node for Max Documentation - Table of Contents |
| Node for Max - Using npm | Node for Max - Using npm |
| node.script |