Mappings
The Mappings system allows you to connect MIDI controllers and the computer keyboard to user interface elements. Mapping uses object parameters to maintain the state and values available for the mapping. Detail on the individual mappings is provided in the ‘Show Mappings’ sidebar pane. Mappings are specific to individual patchers, and are not part of the global state. Mapping is also not available within the Max for Live context.
What can be mapped?
UI elements that can be MIDI and Key mapped are limited to those objects whose values can be stored as a single parameter value (of types Float, Int or Enum). Objects that use the Blob storage type (like rslider, or a multislider with more than one value) cannot be mapped using this system.
MIDI MAPPING
Selecting MIDI Mapping
- Click on the Assign MIDI Map button on the toolbar at the bottom of the patcher.
![]()
When a patcher is in MIDI mapping mode, the Assign MIDI Map button in the Patcher toolbar will turn blue, and objects that are available for MIDI mapping will be tinged blue as well. If an object has a dashed frame, it needs to be mapping-enabled before it can be selected.

Enable MIDI Mapping Via Contextual Menu
While in MIDI Mapping mode, non-parameter UI objects that can be mapped appear with an intermittent outline and greyed out. In order to enable these for Mapping while in Mapping mode, click the object and select 'Enable for Mapping':

A shortcut to turn on MIDI Mapping and select the object for MIDI mapping is to select Assign MIDI Map from the contextual menu on an available UI object (in an unlocked patcher).

Assigning MIDI Controls
- If an object has a dashed frame around it, it must be parameter-enabled prior to mapping. Click on the object and select “Enable for Mapping”.
- Select an object in the patcher. It will be displayed with a frame around the UI.
- Generate a MIDI CC or note; this will be assigned to the selected object.
- A UI element that has been MIDI mapped will have a small rectangle in its upper-right corner.
Navigating while Mapping
- Mapping is available in both locked and unlocked patchers.
- You can move among mapping-enabled objects using the ‘tab’ key.
Removing MIDI Mapping
- While in MIDI Mapping mode, select an object that is currently MIDI-mapped.
- Hit the ‘delete’ key to remove the mapping, or select “Delete Mapping” from the contextual menu.
MIDI Setup for Enable/Disable
- Choose “MIDI Setup…” from the Options Menu.
- By default, all MIDI inputs are selected for Mapping, and all MIDI outputs are deselected. Enable and disable the MIDI ports to be used for Mapping.

MIDI Output
- If any MIDI output ports are selected for Mapping, that output will receive any value changes for mapped parameters.
- Value changes produce by MIDI or Key mapping will send a final value at the completion of the event.
- Value changes produced by user mouse, keyboard entry or Max message activity will produce events as they occur.
KEYBOARD MAPPING
Selecting Key Mapping
- Click on the Assign Key Map button on the toolbar at the bottom of the patcher.
![]()
When a patcher is in key mapping mode, the Assign Key Map button in the Patcher toolbar will turn orange, and objects that are available for key mapping will be tinged orange as well. If an object has a dashed frame, it must be mapping-enabled before it can be selected.

Enable Key Mapping Via Contextual Menu
While in Key Mapping mode, non-parameter UI objects that can be mapped appear with a dashed frame and greyed out. In order to enable these for Mapping while in Mapping mode, click the object and select 'Enable for Mapping':
A shortcut to turn on Key Mapping and selecting an object for Key mapping is to select Assign Key Map from the contextual menu on an available UI object (in an unlocked patcher).

Assigning Keyboard Controls
- If an object has a dashed frame around it, it must be parameter-enabled prior to mapping. Click on the object and select “Enable for Mapping”.
- Select an object in the patcher. It will be displayed with a frame around the UI.
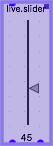
- Type on the computer keyboard to select a key; this will be assigned to the selected object.
- A UI element that has been key mapped will have a small rectangle in its upper-right corner.
![]()
Navigating while Mapping
- Mapping is available in both locked and unlocked patchers.
- You can move among mapping-enabled objects using the ‘tab’ key.
Removing Keyboard Mapping
- While in Key Mapping mode, select an object that is currently key-mapped.
- Hit the ‘delete’ key to remove the mapping, or select “Delete Mapping” from the contextual menu.
Managing MIDI and Keyboard Maps
Displaying the Mapping pane
- To display the mapping pane, click on the Show Mapping button located on the right patcher window toolbar.
- Select MIDI or Keyboard to display the relevant mappings.
![]()
Mapping Management
- Select a mapping by clicking on a row.
- Use the Remove Mapping button to delete a mapping.
![]()
Each row provides options for mapping details:

The options include:
- Enable the mapping by turning on the ‘On’ checkbox.
- The Source shows the MIDI or Key event that will trigger a value change.
- The Parameter displays the type of object.
- Min. allows the minimum value to be set.
- Max. allows the maximum value to be set.
- Exponent (if enabled) determines the curve of value changes.
- Steps sets the number of value change steps.
- Relative Mode allows endless controllers to adjust the value.
- Trigger Mode sets the way that the object responds to trigger-like events. Options are:
- Toggle: The value toggles between minimum and maximum
- Momentary Switch: The value stays at maximum until the event is completed.
- Cycle: The value toggles between several options.
- Bang: The object is treated as if it had received a bang message
- PIckup Mode determines how a value will treat the current setting. Options are:
- Off: The received value is treated like an absolute value.
- Pickup: The object value won’t change until the received value crosses the current value.
- Scale: The value scales until it reaches the minimum or maximum value, then is treated like an absolute value.
- The Exponent, Steps and Relative Mode settings are not available for keyboard mappings.
Saving and Loading to file
- Click on the Mappings Advanced Options button to reveal the Advanced options.
- To save the Mappings for a Patcher to a file, select the Save Mappings to File options, and choose a name and location for the file.
- To restore a saved Mapping for a Patcher, select the Load Mappings from File option, and select a previously saved file.
- If the Patcher has changed since the Mapping file was saved, only mappings to valid objects will be restored.
