In this tutorial, we will show how to load 3D models using the jit.gl.model object and render them in Jitter with lighting, materials and texture mapping.
Review and Setup
You will see a brown background in the jit.pwindow object. The brown color comes from the attribute of the jit.gl.render object.
The attribute allows the jit.pwindow object to be used as a drawing destination, although this was already done and saved with the tutorial patch in this case. The message causes a depth buffer to be attached to the destination, so that automatic hidden-surface removal can be done.
As we saw in the tutorial introducing textures, this message send to the jit.gl.render object causes it to build a texture 64 pixels in both width and height, filled in with a default checkerboard pattern. The texture can be used by any objects in the GL group which are drawing to its context. We are now ready to load some models and render them.
Reading a Model File
The jit.gl.model object reads descriptions of 3D objects as collections of polygons. These descriptions are stored in the .obj file format. The model files must have a .obj extension in order to load. This format is widely used, and has the advantage of being readable and modifiable in ordinary text editors.
This sends the message jit.gl.model object, enabling verbose mode. When this mode is on, you will see information about the model file you are loading printed in the Max Console. It’s not good to leave verbose mode on while you are rendering real-time graphics, but the messages can be very helpful while you are setting up and debugging a patch.
The file should have been installed into Max’s search path when Jitter was installed. If for some reason this file has been moved, you will see the message “• ” in the Max Console. If the file is found correctly, you will see the following in the Max Console:
When the file you specify after the message is found and determined to be a valid model file, the message is printed. Then the dots are printed out every so often while the file loads. Reading large models from text files can take quite a while, so it’s nice to see the dots appearing in order to know that something hasn’t gone wrong.
The Node Names list animation nodes for use with the Jitter animation system. These can be assigned to the attribute of a jit.anim.node object for detailed animation of the group. If you send jit.gl.model a message, then paste the clipboard into a patcher, you will get the complete node hierarchy of the model.
When the model is done loading, is printed. Some operations besides reading a new model cause the model’s representation to be rebuilt internally -- all of them print this message so you know what’s going on.
The message tells you that there are eleven polygon groups in the model. A model need not consist of one like an apple or mushroom, it can be a group of things or an entire scene. Assigning different objects in the model to different polygon groups allows them to be manipulated independently in your patch.
The message tells you how many material definitions there are in the model file. A material definition can specify the ambient, diffuse and specular components of an object’s surface color, as we covered in Tutorial 35. A model file can have multiple material definitions which can be applied to one or more polygon groups in the model. This model, however, has none.
We can also see that this model consists of 10,560 triangles joining 7603 vertices, 20 texture coordinates and 7603 normals. There may be fewer texture coordinates and normals than vertices, because these numbers are referenced in a big index when the model is read, and can be reused when the triangles are constructed.
Model Attributes
If you followed the directions, you’ve been reading all this dry text about messages in the Max Console, while eleven mushrooms hover tantalizingly in the tutorial patch. Now let’s examine the attributes which affect how the model is rendered.
Lighting and Shading
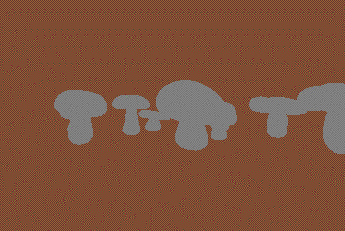
We see the mushrooms in space, but their outlines are simply filled in with the medium gray which is the default color for objects in the GL group.
Now, the model has a more solid appearance because some polygonal areas are brighter and others darker. But each polygon has its own color uniformly over its entire area. The result is rather crude.
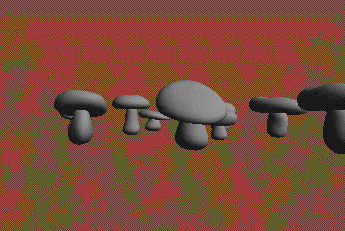
With smooth shading on, the shade of each polygon in the model is blended from vertex to vertex. This hides the polygon edges and gives a smoother appearance -- we are beginning to get somewhere, if realism is our goal.
Texture Mapping
Like other objects in the GL group, you can set the texture applied to the entire model with the “texture” message.
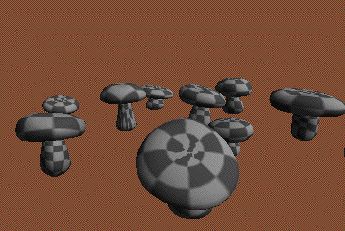
This sets the texture of the model. Since there is a jit.gl.handle object connected to the jit.gl.model object in this patch, we can rotate and move the model as discussed in Tutorial 32, in order to get a better look at how the texture is applied.
Notice the care with which the texture is wrapped around the mushrooms. The caps are covered radially, the stems cylindrically, and there are small variations in the look of each mushroom. These texture coordinates were created in a 3D modeling program by the maker of the model. The coordinates specify what point on the 2D texture to use at each vertex.
To see what the model looks like with automatically generated coordinates, you can use the message. As discussed in tutorial 34, modes of 1, 2 and 3 specify object linear, sphere map, and eye linear mappings respectively. uses the coordinates specified in the model.
In addition to the standard GL group facilities for applying textures, the jit.gl.model object can be used to apply a different texture to each polygon group in the model.
The message sets the texture of polygon group in the model to the texture As a result of the message just sent, polygon group 1 should be set to the grid texture, and thus one of the mushrooms is grid-covered while the other ones remain solid gray. This message could be used in conjunction with the methods for updating textures covered in Tutorial 34 to apply a different picture or movie to each polygon group in the model.
If a message is received for a given polygon group, that group uses the texture named in the message, instead of any texture which may have been sent to the whole model using the message. If a 0 message is received, the named texture is no longer used for that group, and the group reverts to the model’s overall texture.
Drawing Groups
In addition to being texture differently, the polygon groups in a model can be drawn separately. You can control this drawing using the message.
This increments the counter, which causes the message to be sent to the jit.gl.model object. The polygon groups are indexed starting at the number 1. When the jit.gl.model object receives the message it only draws polygon group n of the model until further notice. So now you should see a lone mushroom in the frame.
By clicking the bang object repeatedly, you can cycle through each mushroom in turn. You could use this technique to load a 3D animation, by storing one frame of the animated object in each polygon group of the model.
When it receives the message , the jit.gl.model object turns the drawing of all polygon groups back on.
Material Modes
Models can contain material definitions, but this particular model doesn’t have any. Let’s load one that does.
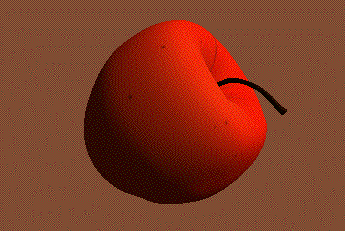
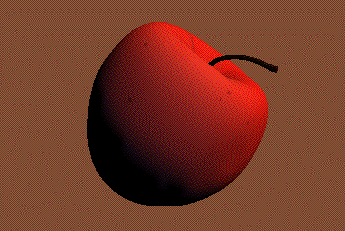
This model is less complicated than the previous one, so it will load much faster. By reading the output of the jit.gl.model object in the Max Console, we can see that it has 4,452 triangles. We can also see in the Max Console that it has 3 materials. In the rendered image of the model, we can see the effects of these materials. Even though no textures have been applied, the apple is red with a brown stem.
The attribute of the jit.gl.model object determines to what extent the materials specified in the model file will be used to render the model. Right now the material mode is 1, the default.
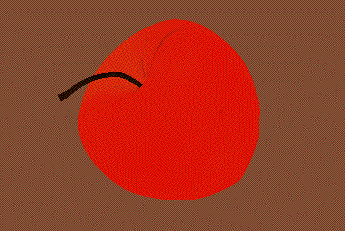
You will notice that the skin of the apple takes on a shinier and slightly bluer appearance, while the stem remains the same flat brown. This is because the specular components of the materials are now being used in the rendering. When we first loaded the apple with the default setting for the material_mode attribute of 1, only the diffuse components of the materials were being used in the rendering.
Now, none of the material properties of the model are being used in the rendering. Instead, the color attribute of the object is used to determine the object’s diffuse color. So, the model appears in the default gray. Let’s try one more setting to see how the various material modes can be useful.
You will see that with lighting disabled, only in material mode 1 do the object’s materials have any effect. Since the diffuse component of the material is being used to determine the object’s color, the flat-shaded drawing takes on a different color for each polygon group.
Here’s a quick recap of the settings of the material_mode attribute:
don’t use materials from model file. The object’s color attribute determines the diffuse color, and the flat color if lighting is not enabled.
Use diffuse material component from model file to determine the diffuse color or flat color of the rendered model.
Use all material components from the model file.
Summary
We have seen how to load complex, multi-part 3D models from .obj format files on disk. The attributes of the jit.gl.model object can be used to affect the model’s lighting and shading and to determine how its materials affect the rendering. The model file may contain different polygon groups which may be drawn and texture-mapped individually.
Thanks to Oliver Ffrench http://o.ffrench.free.fr/meshbank for the use of these elegant freeware models.
See Also
| Name | Description |
|---|---|
| Working with OpenGL | Working with OpenGL |
| jit.gl.handle | Use mouse movement to control position/rotation |
| jit.gl.model | Read and draw various 3D model formats |
| jit.gl.render | Render Jitter OpenGL objects |
| jit.pwindow | Display Jitter data and images |