Adding Files to a Project
To add existing files to a Project:
- Drag a file from the Finder/Explorer into the Project window. It will be automatically added to the Project (as an explicit member) and its dependencies displayed (as implicit members).
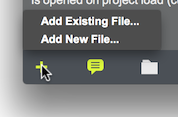
- Click on the '+' button in the Project toolbar or right-click on a Category header to display a menu. Choose Add Existing File..., navigate to the file to add to the Project and click the "Open" button from the File Dialog. The chosen file will be added to the Project (as an explicit member) and its dependencies displayed (as implicit members).

Only patchers saved in Max 6 contain the information required to derive the dependencies for the Project window. If you add an older Max patcher file to your Project and don't see the patcher's dependencies, you may want to resave the patcher.
To create/add new files to a Project, click on the '+' button in the Project toolbar or right-click on a Category header to display a menu. Choose Add New File.... The File Dialog will open to the Project's folder on disk. In general, you can simply type a name for your new file and click the "Save" button from the File Dialog, without navigating any further. If you want to save the file outside of the Project folder, you can do so, but this isn't recommended.
Removing Files from a Project
You can remove files from the Project by highlighting them in the Project window and pressing the "backspace"/"delete" key on your keyboard. Alternately, right-click on a file in the Project window and choose "Remove from Project".
Implicit dependencies cannot be removed from the Project; they are displayed as long as their parent patcher(s) are shown in the Project. Removing an explicit Project member which is also a dependency of some other Project file will cause it to change from "explicit" to "implicit". If you don't wish to see implicit dependencies, you can disable their display in the Project Settings.
See Also
| Name | Description |
|---|---|
| Working With Projects | Working With Projects |