Post-processing Effects and Eye Candy
You've set up an incredible scene with realistic motion and breathtaking lighting, but you need that extra 2% spiciness. This is a list of post-processing effects that can give you that extra push.
Grain
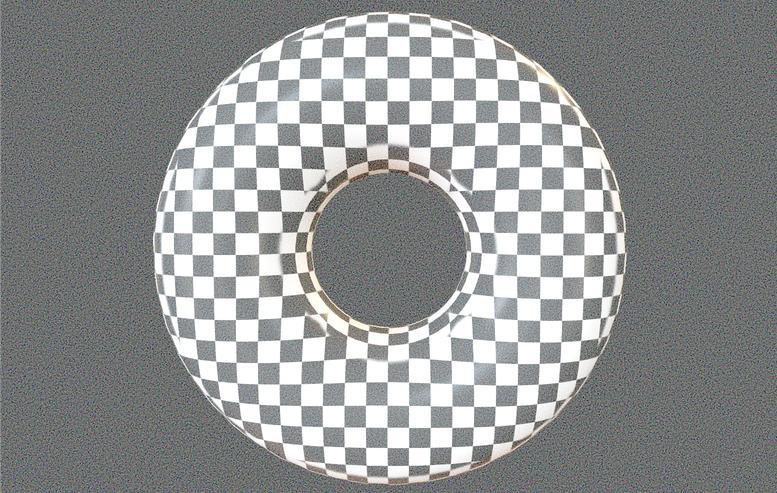
A "grain" effect, often referred to as film grain, is a visual effect that simulates the appearance of tiny particles or irregularities that are typically found in analog film stock. This effect mimics the texture of classic film, replicating the random, slightly gritty pattern that comes from the natural silver halide crystals used in old film emulsions. Adding film grain to your rendering may serve different purposes:
-
Digital footage is often very clean and sharp, sometimes to the point of feeling too clinical or lifeless. Grain can add a subtle layer of texture that makes the image appear more organic. This depth can help avoid the "flat" look that some digital video has and make scenes appear more immersive and visually interesting.
-
If your render contains composited elements (such as 3D elements, images, and videos), adding a grain FX can help make these disparate parts feel more cohesive. Grain effectively "glues" the visual layers together because the consistent texture over the entire frame helps everything blend in more naturally.
-
Grain can also be used to mask minor flaws in footage, such as noise, slight color banding, or imperfections from upscaling lower-resolution video. By adding a layer of grain, you create a visual distraction that makes these issues less noticeable.
To add film grain to your renders in Max, you can use the jit.gl.pass effect called "grain".
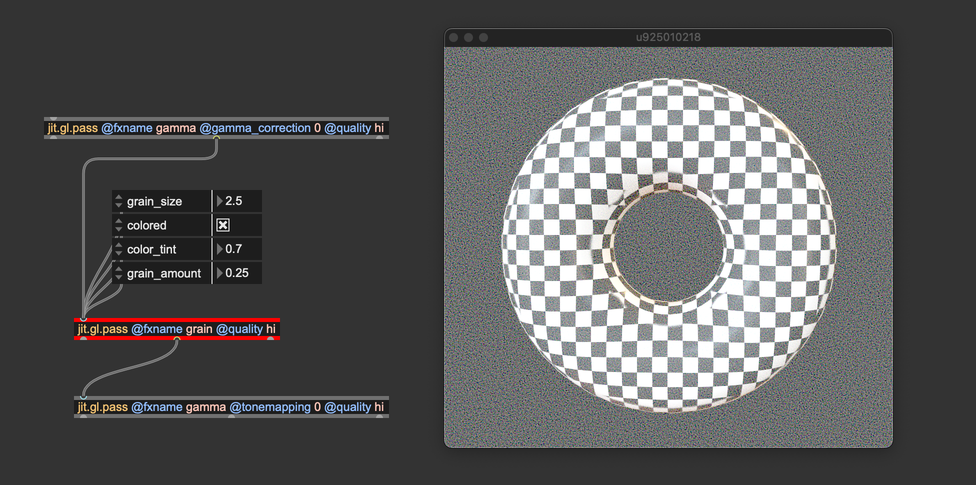
The pass FX "grain" is controlled by few simple parameters:
@grain_amountdetermines the amount of grain to apply@grain_sizecontrols the dimension on the silver halide crystals@coloredis a boolean control to decide between monochromatic and colored grain@color_tintcontrols the grain color tint (only working with@colored1); you can use this control to give a tint to the film grain, simulating different film models.
Film grain must be applied after tonemapping, and before gamma correction. The grain is added to the color values, hence, if colors are clipped, no grain will be visible in the image. Also, it must come right before gamma correction, with no intermediary effect. Since the grain effect simulates the behavior of the support (film) capturing the animated sequence, it should be placed last and shouldn't be affected by any other effect (other than gamma correction).
Vignette
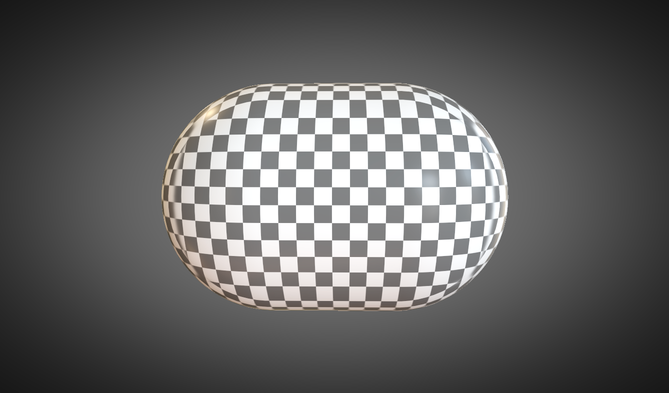
A vignette effect is a visual effect that gradually darkens or lightens the edges of the video frame, leaving the central part of the frame more prominent. The primary purpose of a vignette is to draw the viewer’s attention towards the center of the frame or a key subject. By slightly darkening the edges, the eye is naturally guided to the brighter, central part of the scene. This is particularly useful when you want to make sure that viewers are focusing on the main character or critical action in the shot.
Vignetting is often associated with traditional cinematic visuals, as it was originally a natural characteristic of old lenses and film stock. Adding a vignette gives your video a subtle, filmic quality that can feel sophisticated, adding a professional aesthetic that makes your footage feel more like something seen in the movies!
To add a vignette effect in Max you can use the jit.gl.pass effect called "vignette".
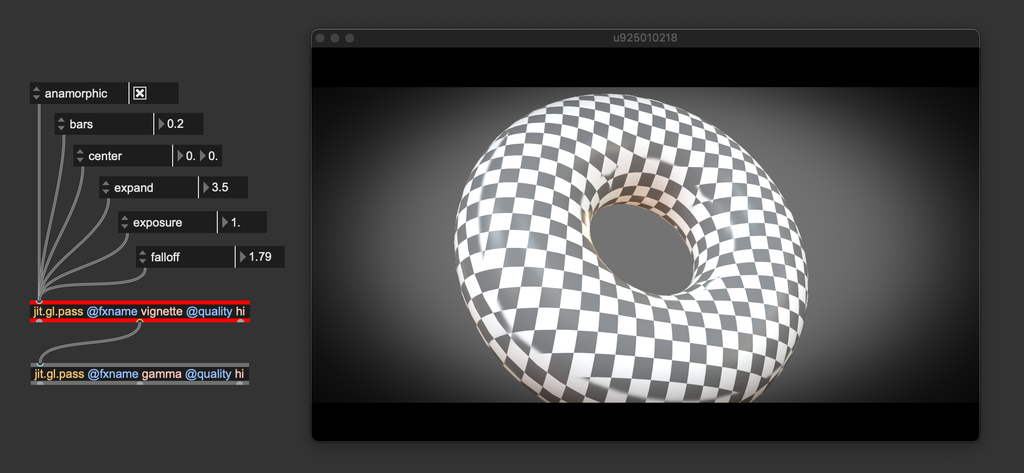
This pass effect is controlled by the following attributes:
@centersets the normalized coordinates of the vignette's center.@expandcontrols the steepness of the transition from the uneffected vignette center to the darker areas@falloffcontrols at which distance from the vignette's center the darkening effect begins@exposurecontrols post-vignette exposure. Use this attribute if you need to gain back some brightness after applying the vignette@anamorphicis a boolean control that let you decide between non-anamorphic (0) and anamorphic (1) vignetting.@barscreates two black bars at the top and the bottom of the image. Use this functionality to give a cinematic wide-screen look to your render.
Consider applying an off-center vignette to highlight and emphasize the light originating from a specific direction:
Bloom
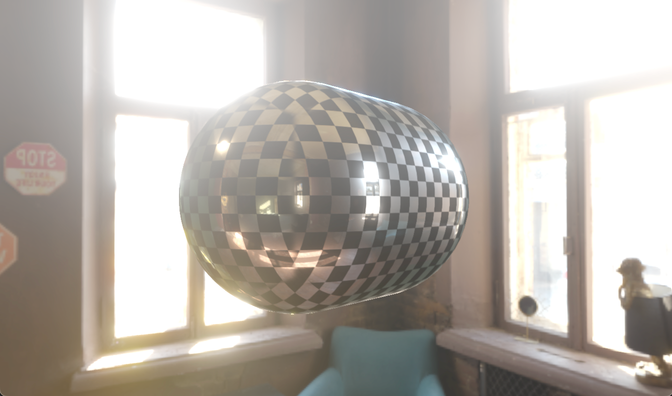
The bloom effect is a visual effect that simulates an intense, glowing halo of light that appears to “bloom” or spread out beyond the bright areas of an image, giving the impression of light spilling over into surrounding parts of the frame. Bloom is often used to emulate HDR, making it feel like the bright parts of the image are more intense than what a standard screen can naturally produce. It helps accentuate highlights without losing too much detail, creating a sense of depth between the shadows and light areas. The bloom effect helps to ensure that those bright regions feel vivid and realistic, enhancing the sense of dynamic range.
In older lenses, bright highlights tended to bloom as the light scattered inside the lens elements. Adding a bloom effect helps replicate this imperfection, which is often perceived as aesthetically pleasing because it adds a bit of warmth and life to a shot. Many filmmakers appreciate this look for the same reason they add grain—it gives the footage a more human and imperfect quality, moving away from the stark, clinical sharpness of modern digital cameras.
In Max you can create a bloom effect using jit.gl.pass @fxname bloom-hq
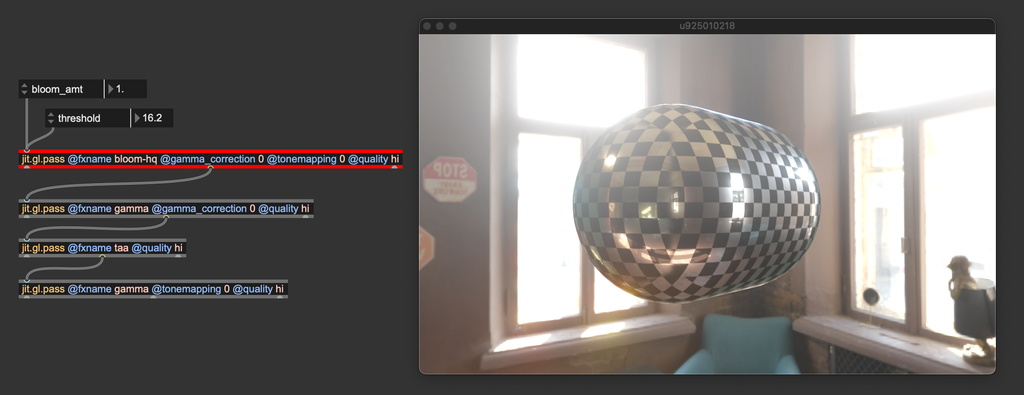
The two main control paramters for this pass effect are:
@bloom_amtcontrols the intensity of the bloom effect@thresholdsets the lowest luminance that can produce a bloom effect
The bloom-hq pass effect has been designed to be a "finisher" effect, and it has tonemapping (ACES) and gamma correction functionalities enabled by default. If you want to manage tonemapping and gamma correction manually (which we recomend), disable the attributes @tonemapping and @gamma_correction. Moreover, the bloom effect must always come before tonemapping in the processing chain because it works by adding bright color values to the original image, very often leading to color clipping. Tonemapping after the bloom FX ensures colors don't exceed the value 1.
Conclusion
These are some of the post-processing effects available in Max. We’ve highlighted those designed to replicate real-world phenomena, but many other excellent effects have been left out of this list. The jit.gl.pass object is a particularly powerful tool, not only because it offers a built-in collection of post-processing effects, but also because it allows you to create your own. If you haven’t explored it yet, I encourage you to dive in, experiment with its features, and try building custom effects to expand your creative possibilities.
In summary
- Post-processing effects can help enhance your renders.
- jit.gl.pass
@fxname graincreates a film grain effect; use it to mitigate the "too-digital" look of rendered scenes, to glue elements together, and to mask small imperfections. It must always be placed right before gamma correction. - jit.gl.pass
@fxname vignettecreates a vignette effect; use it to drive the viewer's attention towards the subject of the shot. - jit.gl.pass
@fxname bloom-hqcreates a bloom effect; use it to make the rendering feel more realistic by simulating how light scatteres inside the camera's lens elements. Disable@tonemappingand@gamma_correctionif you want to manage these color correction functions manually, and always place it before tonemapping in the processing chain.