Depth Testing vs Layering
Composing GL objects and textures in a scene generally uses one of two techniques: depth testing and layering. There are a few attributes exposed to all GL objects that accomplish these techniques: layer, depth_enable, blend_enable, and blend.
Depth Testing
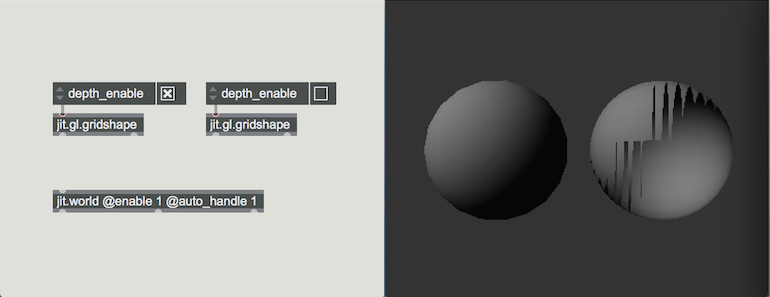
When drawing 3D geometry, oftentimes we want the shape to appear solid with the closest faces covering those furthest from the camera. To accomplish this, the rendering system performs what is called depth testing, where the renderer checks the depth (distance from the camera) of every pixel and compares that with the depth of whatever pixels may have been previously drawn in the same location. If the new pixel is closer it will be drawn, otherwise it will be discarded.
In order to perform depth testing, the GL rendering context has to have a depth buffer where it stores depth information. By default, every context has a depth buffer. Whether or not a context has a depth buffer can be set on jit.window and jit.pwindow with the depthbuffer attribute. Additionally, every jit.gl object has a depth_enable attribute. This is on by default, but can be used to control depth testing on a per object basis.

Layering
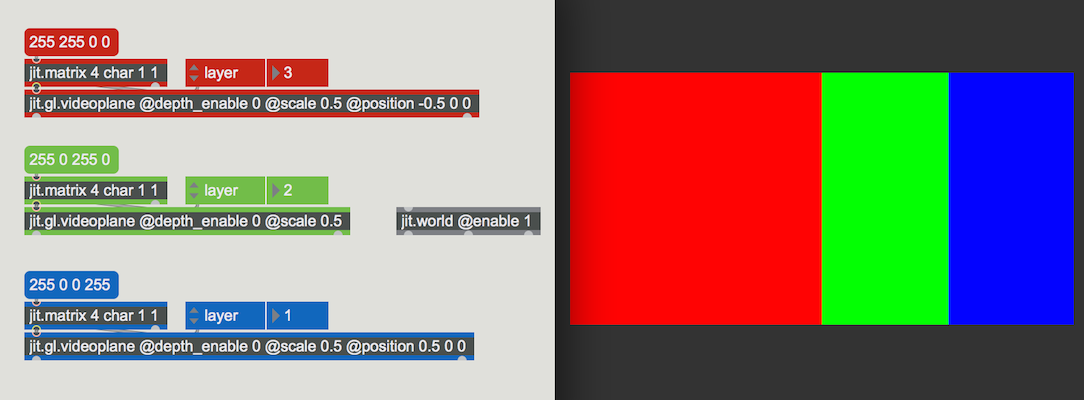
Layering is a technique that allows users to control the order that gl objects are drawn using the layer attribute. To composite by layering the depth_enable attribute should be set to 0, otherwise depth testing will override the layer value. By default, all GL objects are added to layer 0, and therefore their drawing order is indeterminate. Simply by changing the layer attribute to higher or lower values, the drawing order can be determined, where higher values are drawn on top of lower values.

Blending
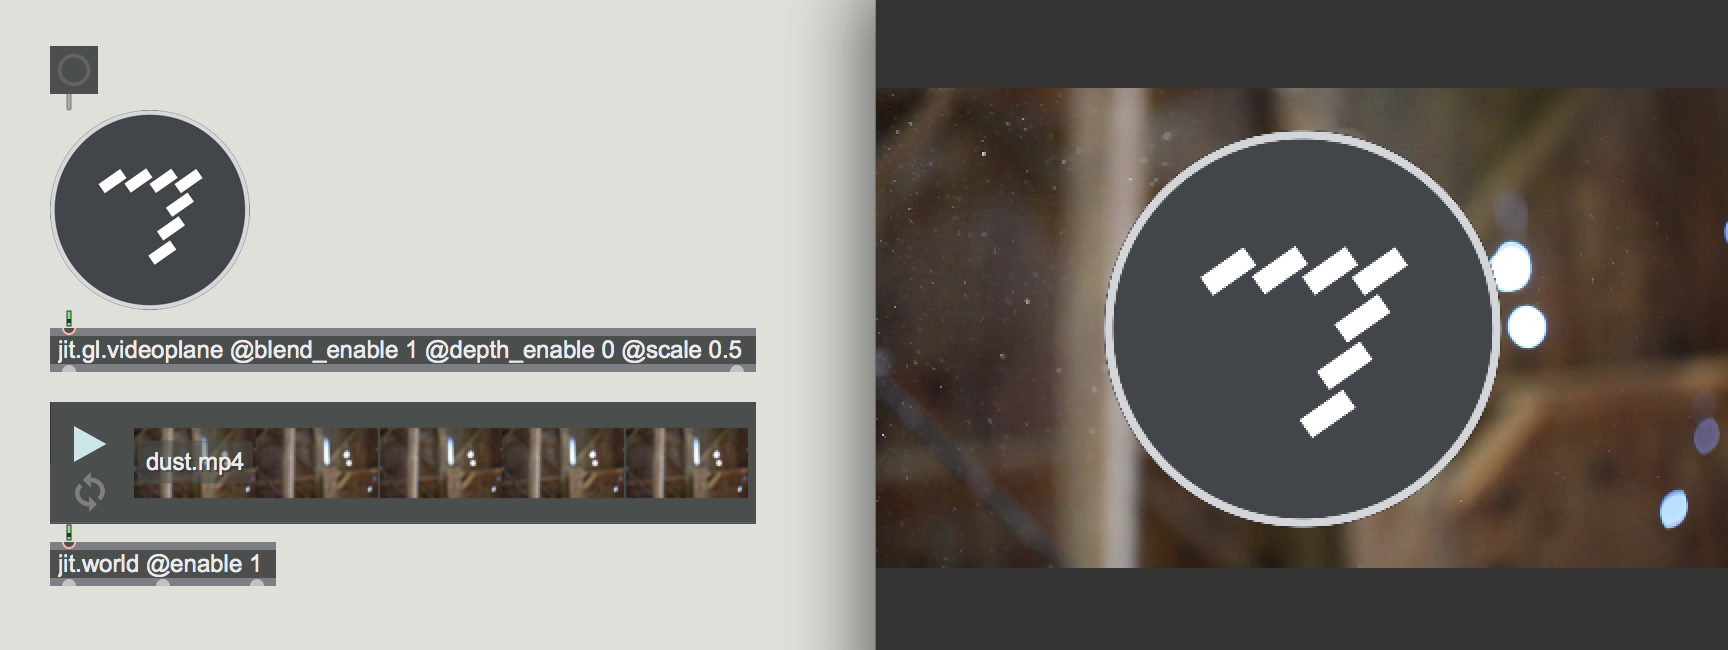
Blending is an additional tool for compositing when layering. By enabling blending, users can allow overlapping layers to blend together. If blending is disabled then top layers completely obscure lower layers. Blending is enabled by setting the attribute @blend_enable 1 on the relevant objects. To determine the type of blending users may adjust the blend attribute. By default blend is set to alphablend, which looks at the alpha value of the object's pixels. If that value is less than 1, the pixels will be transparent, allowing pixels from lower layers to show through. Pixel alpha value is determined by the last value of the object's color attribute. If the object has a texture, then this value is multiplied with the alpha plane value of the texture. Images and movie files that contain alpha values (e.g. PNG, TIFF, Animation codec, and ProRes 4444) can be displayed with proper transparency by texturing an object with alphablend enabled.

Combining the Techniques
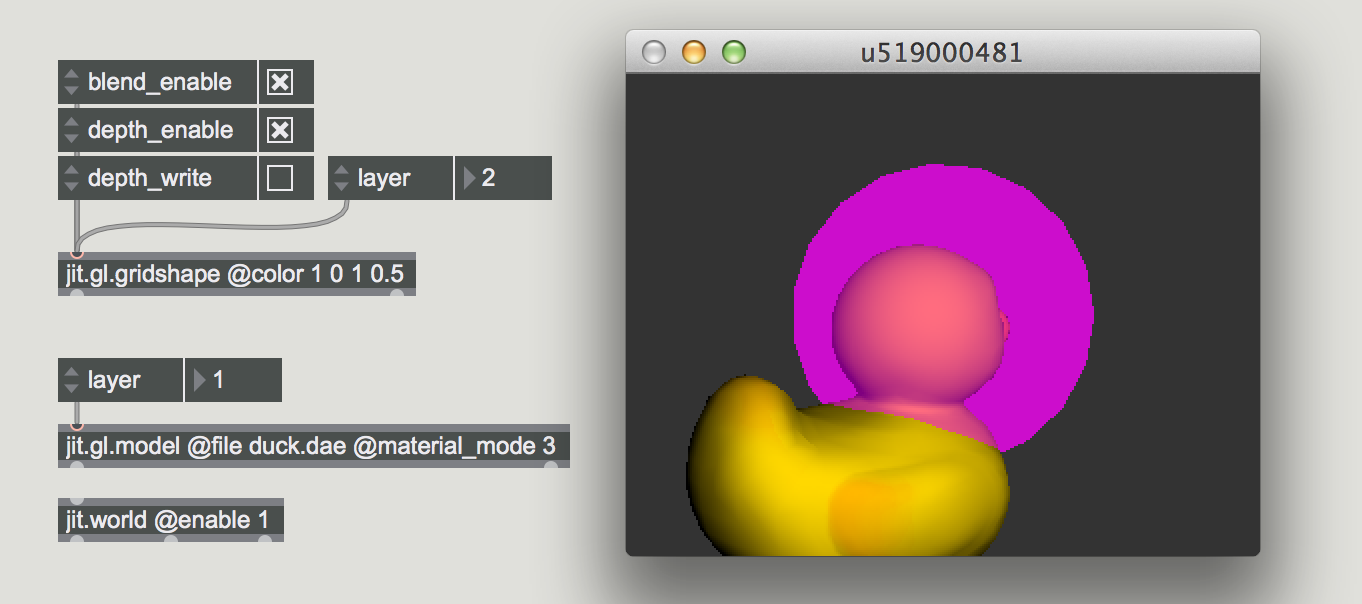
The three techniques of depth testing, layering, and blending can be used simultaneously. For example when adding a transparent overlay to a 3D scene. In this case the solid objects should have @depth_enable 1, and the transparent objects @depth_enable 0 and @blend_enable 1. The transparent objects should be drawn last, by setting their layer attribute to a value higher than the solid objects layer.
There is an additional technique for blending transparent and solid objects with depth testing. This technique utilizes the GL object’s depth_write attribute. When depth_write is disabled, the object will not update the depth buffer with its current depth values. This technique is often used with particle system effects, allowing the particles to blend in the scene with transparency, and still be occluded by the solid scene elements. To implement, depth testing should remain enabled for both solid and transparent elements (@depth_enable 1), and depth writing should be disabled for the transparent elements (@depth_write 0). The transparent layer value should again be higher than the solid layer.

Further Reading
See Also
| Name | Description |
|---|---|
| Working with OpenGL | Working with OpenGL |