Video and Graphics Tutorial 2: Live Capture
Intro
Now that we have video playback working, we’ll turn to using live video input as source material for image processing. To do that, we’ll use your computer’s built-in camera.
Setup
As in the previous lesson, we’ll be using jit.world to display the output of our Jitter patch, so add jit.world and toggle objects to your patch. Next, create a jit.grab object and connect the left outlet to the inlet of your jit.world object. To start up the camera, add a message box containing the message , connect it to your jit.grab, then lock the patch and click on the message box. Finally, turn on the toggle connected to jit.world to see the camera image in the window.
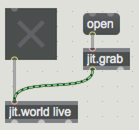
Image Control
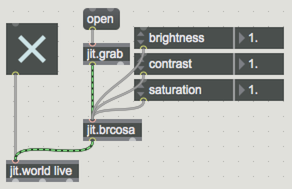
Now that the live image is being captured, let’s introduce some image processing into the signal flow. Create a new jit.brcosa object , an all-in-one brightness, contrast and saturation effect.
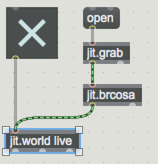
Connect this between the outlet of the jit.grab and the inlet of the jit.world objects. To adjust the image, we need to send messages to change the brightness, contrast and saturation. For now, we’ll do this using a special object called attrui (attribute user-interface) that exposes the attributes of any object it is connected to.
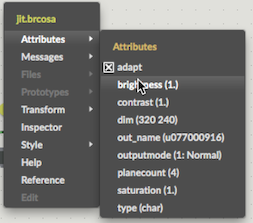
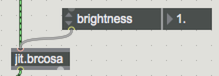
To attach an attrui control, click the left-hand side of the jit.brcosa object box to display the object menu.

From there, navigate to the Attributes section and select Brightness. This will automatically create an attrui connected to jit.brcosa with the desired attribute.
Notice that a floating point number appears on the right side of the attrui.
Follow the same steps to add attrui controls for the Contrast and Saturation attributes, lock the patch, then play around with these values to see how they affect the image.
Explore Further
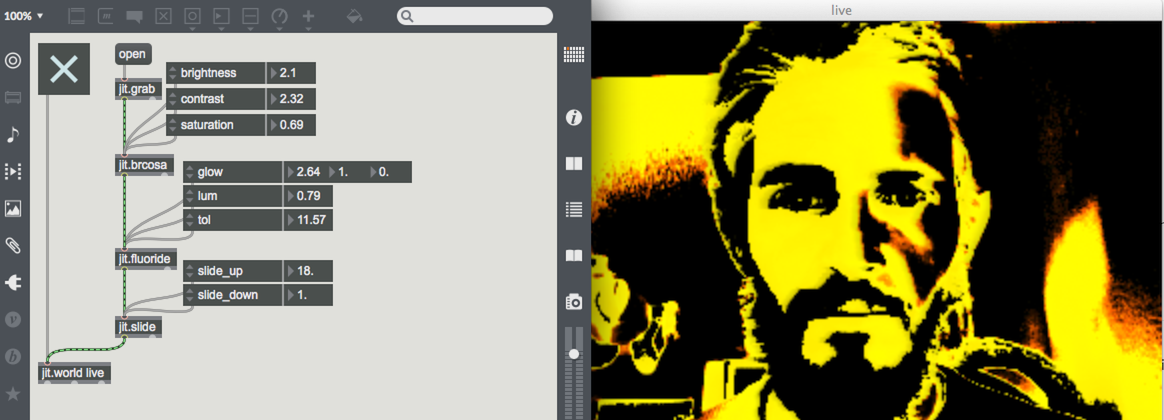
Now that you have successfully added an effect, you can use the same technique (insert an object, connect attrui objects to the object, change parameters) to explore a variety of other video processing possibilities within Jitter. Try out jit.fluoride for selective neon tinting, jit.hue for some dramatic color shifting, jit.slide for quick and fun frame blending and jit.wake for classic video feedback.
Some objects (such as jit.brcosa and jit.slide) will have only a few attributes while others (jit.wake and jit.plur) will have a lot more. You’ll find you can get to know a lot about Jitter objects by just connecting them and using attrui to try out their attributes.