Tutorial 34: Using Textures
This tutorial shows you how to create and apply textures to 3D geometry data generated by the GL group. It will cover the creation of a named texture, assigning a named texture to a GL object, the use of colors in conjunction with textures, the conversion of image/video data to a texture, and various ways to wrap the geometry with a texture.
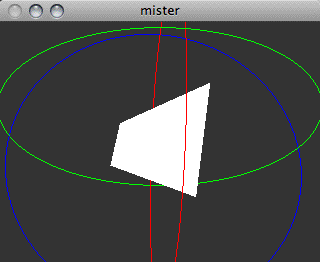
You will see a white parallelogram, but it is actually a tetrahedron being drawn by the jit.gl.plato object. The jit.gl.plato object is capable of rendering several platonic solids including tetrahedrons, hexahedrons (also known as cubes), octahedrons, dodecahedrons, and icosahedrons. Since lighting is not turned on and there is no texture being applied to the tetrahedron, it is difficult to tell that it is actually a 3D shape.
This should illustrate that it is actually a 3D shape, but by applying a texture to the jit.gl.plato object, this will become even more apparent.
What is a Texture?
A texture is essentially an image that is overlaid upon geometry. Just like other images in Jitter, textures have an alpha, red, green, and blue component. In order to make use use the alpha component, blending must be enabled. Blending is covered in detail in Tutorial 33.
In Jitter, a texture has a name and belongs to the jit.gl.texture object. Other objects that are attached to the drawing context associated with a given jit.gl.render object may make use of any of the named textures attached to that jit.gl.render object. Jitter permits arbitrarily sized textures. There is a minimum size of 1 by 1 and a maximum size dependent upon the OpenGL implementation.
Creating a Texture
The attribute takes two arguments that specify the width and height of the texture. This creates a by texture named , and fills it with the default pattern (a white and grey checkerboard). You will not see any of the results yet, because the texture has not yet been applied to the geometry.
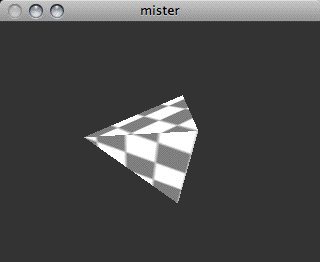
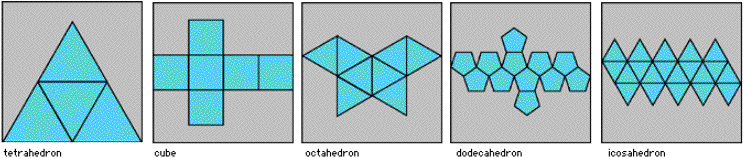
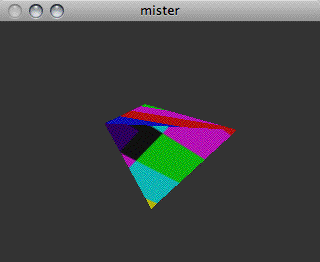
The jit.gl.plato object uses a "gift-wrapping" strategy to apply the texture to the tetrahedron. The image below illustrates exactly how the different platonic solids are wrapped.
Textures and Color
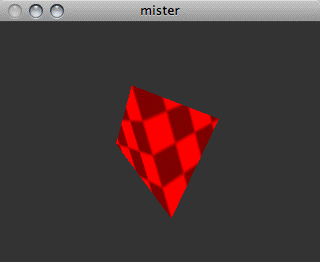
When applying a texture to geometry, OpenGL also takes into account color and lighting information, so the current color and lighting values will be multiplied with the texture image when drawn. If the color is white and lighting is turned off, the texture colors will be unaltered.
Converting an Image or Video to a Texture
While it is illustrative, typically you will want to make use of textures other than the default grey and white checkerboard. This can be accomplished by loading an image or a movie into the jit.movie or jit.matrix objects and sending the output to the jit.gl.texture object.
You still won't see any of the results yet, because the jit.gl.plato object is still using the texture named .
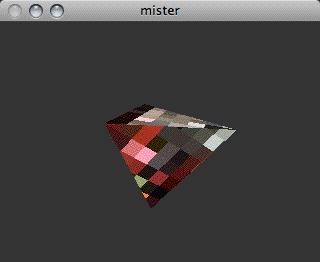
Now you should see the colorbars image wrapped around the tetrahedron.
In many instances you will only need to use still images as textures, but Jitter also supports the use of moving video as textures by repeatedly copying the output of the jit.movie object into the named texture.

Interpolation and Texture size
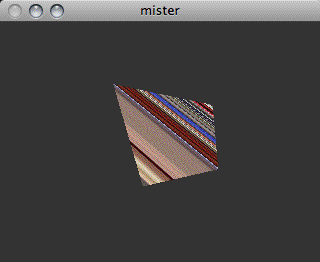
By default, texture interpolation is turned on, so screen pixels which are between texture pixels will use an interpolated value of its neighbors within the texture image. This has the effect of blurring or smoothing out the texture. To apply textures without interpolation, the interpolation may be turned off using the jit.gl.texture object's attribute and setting the value to none.
By default the texture will adapt its width and height to that of the incoming matrix. The texture size can be changed, by sending the message where and specify the new dimensions.
Mapping Modes
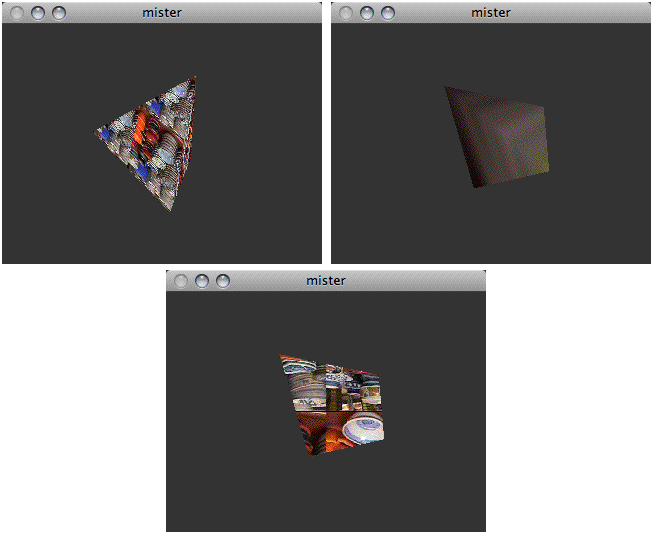
So far we have only addressed the implicit texture mapping that the jit.gl.plato object provides. OpenGL also provides a few other explicit texture mappings for applying textures to geometry data. These are the object linear, eye linear, and sphere map mapping modes.
The object linear mode applies the texture in a fixed manner relative to the object's coordinate system. As the object is rotated and positioned in the 3D scene, the texture mapping remains the same. In contrast, the eye linear mode applies the texture in a fixed manner relative to the eye's coordinate system. As the object is rotated and positioned in the 3D scene, the application of the texture to the object will change. Lastly, the sphere map mapping mode will produce the effect commonly called "environment mapping"; the object is rendered as though it is reflecting the surrounding environment, and assumes that the texture contains a sphere mapped image of the surrounding environment. As the object is rotated and positioned in the 3D scene, the application of the texture to the object will change.
These explicit mapping modes may be used by setting the GL group attribute. A value of is the default and will use the GL object's implicit texture coordinates. A value of will use OpenGL's object linear mode. A value of will use OpenGL's sphere map mode. A value of will use OpenGL's eye linear mode.
OpenGL's object linear and eye linear mapping modes have additional parameters that affect the way in which they apply the texture. These are set with the GL group and attributes. These attributes are each vectors in 4 dimensional homogenous coordinates. The scalar product of and a given point in 4 dimensional homogenous coordinates determines the horizontal position of the texture image to apply. The scalar product of and a given point in 4 dimensional homogenous coordinates determines the vertical position of the texture image to apply. By default, is equal to and is equal to
A more detailed description of how the and attributes affect the texture mapping are out of the scope of this tutorial, but that doesn't mean you can't play with it anyway to generate interesting effects. For the curious, please consult the OpenGL Red Book or Blue Book.
A more user friendly way of manipulating the and attributes is contained in the green box via the subpatch named . This subpatch handles the math necessary to perform rotation, zoom, and anchor offset operations on the texture.
Summary
We have established how to create textures and various ways to apply them to the geometry created by the GL group. The jit.gl.texture object may be used to create, size, and copy image or video data to named textures. The GL group attribute specifies which named texture to use, and the GL group attribute selects either the implicit texture mapping mode or one of the three explicit OpenGL texture mapping modes: object linear, eye linear, or sphere map.
See Also
| Name | Description |
|---|---|
| Working with Video in Jitter | Working with Video in Jitter |
| Working with OpenGL | Working with OpenGL |
| GL Texture Output | GL Texture Output |
| GL Contexts | GL Contexts |
| jit.gl.handle | Use mouse movement to control position/rotation |
| jit.gl.plato | Generate platonic solids |
| jit.gl.render | Render Jitter OpenGL objects |
| jit.gl.texture | Create OpenGL textures |
| jit.matrix | The Jitter Matrix! |
| jit.movie | Play a movie |