Tutorial 31: Rendering Destinations
In the previous tutorial, we saw how to draw OpenGL graphics into a jit.window using the jit.gl.render object. Now we will look at the other kinds of destinations into which a jit.gl.render object can draw, what to use them for, and how to switch between destinations.
Open the tutorial and double-click the subpatch to open it.
In the upper left of the patch is a jit.gl.render object with an argument of , along with other objects.
You should see a red ball appear in the jit.window object. The jit.gl.gridshape object is drawing the ball. Its first argument, , specifies the drawing context currently being drawn by the jit.gl.render object to the jit.window. The other arguments set the and attributes of the ball.

Drawing and Swapping Buffers
Clicking the toggle starts the qmetro object, which sends messages to the object t . This object first sends an message followed by a message to the jit.gl.render object, and then a message that is used elsewhere in the patch.
When the jit.gl.render object receives the message, it draws all of the GL group objects which share its destination, then copies its offscreen buffer, if any, to the screen. An offscreen buffer is an area of memory not visible on the screen, the same size as the drawing destination. By default, all drawing contexts have an offscreen buffer. Drawing is done into the buffer, which must then be copied to the screen in order to be seen.
The offscreen buffer makes flicker-free drawing and animation possible, as we see here. Even though the buffer is being erased before the red ball is drawn each time, we never see the buffer in its erased state. To see what drawing looks like without the offscreen buffer, click on the message box in the upper right of the patch . You will probably see the image start to flicker. This happens because the message now causes the window itself to be erased, not the offscreen buffer. The window remains blank for a short but indeterminate period of time before the red ball is drawn, so you can see the area under the ball flickering between red and the dark gray of the erased window. Click the message box to remake the offscreen buffer and stop the flickering.
Setting Fullscreen Mode
The p subpatch contains a key object, a select object, a toggle, a message box and an outlet object that sends the results of the subpatch to the jit.window object. This is standard Max stuff, so we won’t go over it in too much detail— the result is that the escape key toggles between sending the messages and to the jit.window object. (See the "Full Screen Display" section of Tutorial 14.)
You can use the attribute in conjunction with the message to hide the menubar in addition to covering the screen. If the jit.window object has the attribute set to 0, the menubar will be hidden
Setting a jit.pwindow Destination
The jit.gl.render object can draw to two different kinds of destinations. This patch contains an object example of the two: a jit.window and a jit.pwindow. Right now we are rendering to the jit.window object. To change the destination to the jit.pwindow object, we need to first the jit.pwindow object and then set the destinations of the jit.gl.render object and the jit.gl.gridshape object.
This names the jit.pwindow object, which allows it to be used as a rendering destination. To switch the drawing to this destination, we need to send messages to both the jit.gl.render object and the jit.gl.gridshape object, telling them about the new destination.
The symbol is prepended to the message , and the result is sent to the s object. Two objects receive this message — jit.gl.gridshape and t . The trigger object sends a sequence of messages to the jit.gl.render object, which tell it to:
- Erase its current destination’s draw buffer
- Swap that buffer to the screen, visibly clearing the old destination, and
- Switch future drawing to the new destination.
The result is that the red ball is displayed on the jit.pwindow object at the right of the patch.
Rendering to a Jitter Matrix
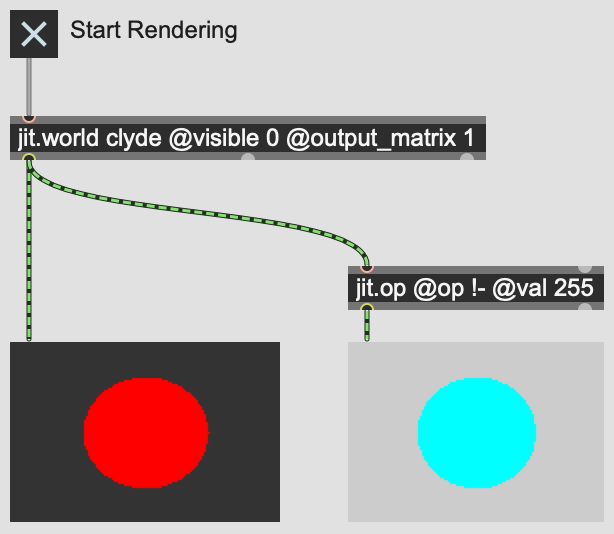
You may want to create a rasterized image of your OpenGL scene so that any of Jitter's video-processing effects can be applied to the image. You can do this by using the attribute of the jit.world object. Click the toggle labeled Start Rendering.
You should see a cyan ball on a light gray background. This is because the red ball image generated by OpenGL is processed through the jit.op object, which subtracts each color component from 255, inverting the image.
Multiple Renderers and Drawing Order
To move an OpenGL scene to a different destination, the jit.gl.render object as well as any GL group objects involved in drawing the scene must receive the message. Why not just send a message to the renderer, telling it to move the entire scene? The reason is that each GL group object can have an independent destination, as well as each renderer. Objects in the GL group can be moved between multiple renderers. To see an example of why this might be useful, please look at the right-hand portion of the patch for this tutorial.
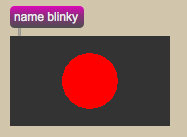
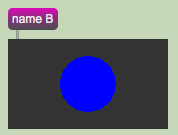
At the right are three jit.pwindow objects named , and . The message box objects above them are not strictly necessary, because once a jit.pwindow object has been named, its name is stored with it in the patch. But they are useful here as labels and as a reminder of what messages to send to name the objects.
There are also three jit.gl.render objects in the patch. Each of them is pointed at a different destination.
This repeatedly sends the message followed by a message to each of the three renderers. You should see a yellow circle within a blue circle in the topmost drawing destination. This simple OpenGL scene is created by the two jit.gl.gridshape objects in the bottom left of the patch. We can move each of these objects to any of the three drawing destinations present.
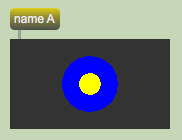
Each time a jit.gl.render object receives a message, it draws all of the GL group objects that have been added to its context. It draws the objects in the order in which they were added to the context. In this case, the yellow circle was added to the draw context named "B" after the blue circle, so it appears on top. To change this order, we can send the message to the jit.gl.gridshape object drawing the blue circle again. This will remove it from its present place in the list of objects for the context named , and add it again at the end of the list.
Summary
We have introduced a flexible system for creating multiple OpenGL renderers and drawing destinations, and for moving objects in the GL group between them using messages.
Two Jitter objects can function as drawing destinations: jit.window and jit.pwindow. Each kind of destination has different uses. A jit.window object can be moved to different monitors and quickly enlarged to cover the screen. A jit.pwindow object keeps its location in the patch. Futhermore, we can use the matrix output of the jit.world object to create a rasterized image of the 3D scene, to which further video processing may be applied.
See Also
| Name | Description |
|---|---|
| Working with OpenGL | Working with OpenGL |
| Video and Graphics Tutorial 4: Adding 3D Objects | Video and Graphics 4: Adding 3D Objects |
| GL Contexts | GL Contexts |
| jit.gl.gridshape | Generate simple geometric shapes as a grid |
| jit.gl.render | Render Jitter OpenGL objects |
| jit.matrix | The Jitter Matrix! |
| jit.pwindow | Display Jitter data and images |
| jit.window | Display data in a window |
| qmetro | Queue-based metronome |