Tutorial 18: Iterative Processes and Matrix Re-Sampling
This tutorial demonstrates a more complicated example of when to use named jit.matrix objects, as well as how to use jit.matrix objects to upsample and downsample an image. The upper left-hand corner of the patch contains a jit.movie object that has a still image (the file fuzz_circle.jpg) loaded into it when the patch opens.
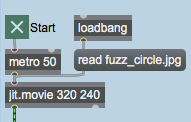
- Start the metro object by clicking the toggle box above it. You should see an image appear in the jit.pwindow in the lower right of the tutorial patch:
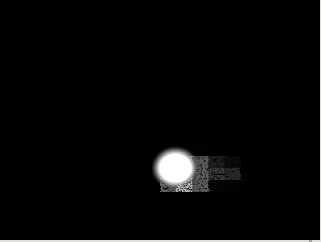
The fuzz_circle.jpg file contains an image of a white circle with a black background, which is being scaled in size to appear as a small circle inside of our final matrix.
Getting Drunk
The top part of the patch writes the image from the jit.movie into the first jit.matrix object in the chain. A bang generated by the bangbang object changes the dstdimstart and dstdimend attributes of the jit.matrix object with each frame, randomly varying the coordinates using Max drunk objects. Note that our first jit.matrix object has its usedstdim attribute set to 1, so that it will scale the input matrix:
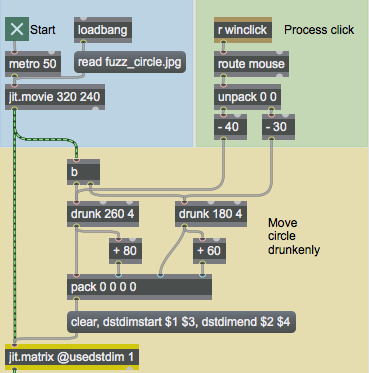
This first jit.matrix, therefore, simply serves to scale the circle image to fit in a small (80 by 60) region of our output matrix. Note that the message box that formats the coordinates for the scaled image also clears the matrix with every frame (with a clear message), so that there are no artifacts from a previously written image. The Max drunk objects vary the placing of the circle, causing it to jitter around (no pun intended).
- Click somewhere in the jit.pwindow in the lower right corner of the patch. The circle will jump to the position you clicked, and begin to move from there.
The result of a mouse click in the jit.pwindow is sent to the receive object with the name winclick. This message is then stripped of its selector (mouse) and the first two elements (the x and y position of the mouse click) are extracted by the unpack object. These coordinates are then used to set the new origin for the drunk objects.
The Feedback Network
Once our circle image has been scaled and placed appropriately by the jit.matrix object, our patch enters a feedback chain that centers around a pair of jit.matrix objects sharing a matrix named blurry :
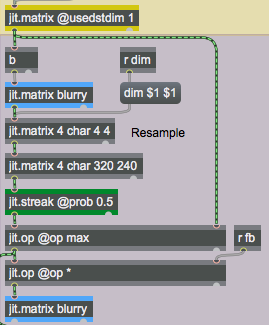
This section of the patch contains four jit.matrix objects (not including the one at the top which scales down the circle image). Two of the objects share a name (blurry) and are used simply to store and retreive previous matrices generated by the rest of the patch. The topmost jit.matrix object sends its matrix to the rightmost inlet of the first jit.op object in the patch. In addition, it sends a bang to the first named jit.matrix object using a bangbang object, causing it to output its stored matrix (called blurry). This matrix eventually ends up in the left inlet of the jit.op, where it is then displayed (by the jit.pwindow) and multiplied by a scalar (the second jit.op object). It eventually overwrites the previous blurry matrix (by going into the bottom named jit.matrix object). Without worrying about what the intermediate Jitter objects do, you can see that the blurry matrix will hold some version of the previous 'frame' of our circle image:
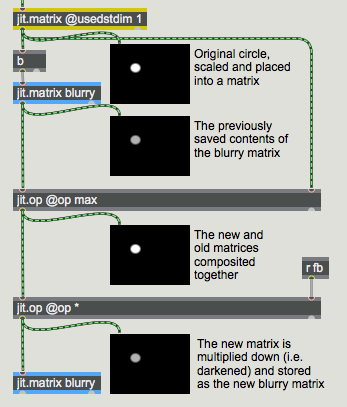
The new and old images are combined by the first jit.op object using the max operator. The max operator compares each cell in the two matrices and retains the cell with the highest value. The second jit.op object (with the * operator) serves to darken our image by multiplying it by a scalar (set by the number box on the right of the patch that is sent to the receive object named fb):
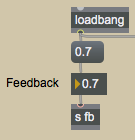
- Change the feedback amount of the patch by playing with the number box labeled Feedback in the blue region of the patch. Notice how the trails after the circle increase or decrease when you move the circle by clicking in the jit.pwindow, depending on how the feedback amount is set.
Downsampling and Upsampling
The final step in our image processing algorithm concerns the part of the patch in between the first named jit.matrix, which sends out the matrix saved there during the previous frame by the jit.matrix at the bottom, and the first jit.op object, which composites the previous matrix with the new one:
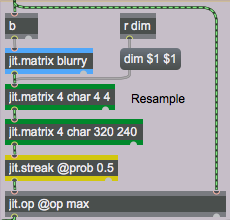
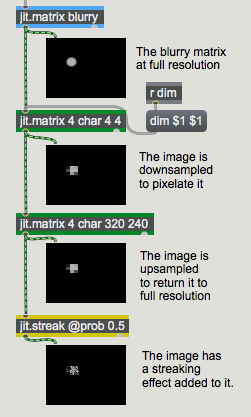
The two jit.matrix objects colored green in the tutorial patch are used to resample the blurry image matrix coming out of the jit.matrix object above them. The first of the two jit.matrix objects has its dim attibute set to 4 x 4 cells. This size can be changed by setting the attribute with the number box in the blue region with the caption Pixelation. This number gets sent to the receive object named dim above the jit.matrix object.
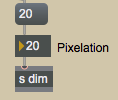
- Change the number box labeled Pixelation in the blue region of the tutorial patch. Notice how the circle trails change.
By downsampling the image matrix, the jit.matrix object copies the 320 x 240 matrix from its input into a much smaller matrix, jettisoning excess data. The result is a pixelation of the image that you can control with the dim of the matrix.
The second jit.matrix object upsamples the matrix back to a 320 x 240 matrix size. This is so that when subsequent Jitter objects process the matrix, they will have a full resolution image to work with and will output a full resolution matrix.
The jit.streak object adds a nice effect to the pixelated trails by randomly 'streaking' cells into their neighbors. The prob attribute of jit.streak controls the likeliness that any given cell in the matrix will be copied onto a neighboring cell. Our jit.streak object has a prob attribute of 0.5, so there's a 50% chance of this happening with any given cell.
Technical Detail: By default, jit.streak copies cells towards the left. Changing the direction attribute will alter this behavior. There is also a scale attribute that determines the brightness of the 'streaked' cells as compared to their original values. The help patch for jit.streak explains more about how the object works.
Summary
Pairs of named jit.matrix objects can be used effectively to store previous iterations of a Jitter process. These techniques can be used to generate video delay effects by combining the previous matrix with the current one using matrix compositing objects such as jit.op. You can also use jit.matrix objects to resample an image (using the dim attribute), both to perform an algorithm more efficiently (the smaller the matrix, the faster it will be processed by subsequent images) and to create pixelation effects. The jit.streak object performs random cell streaking on an input matrix by copying cells over to their neighbors according to a probability factor (set by the prob attribute).