Mapping
The Mappings system allows you to connect MIDI controllers and the computer keyboard directly to user interface objects. If you've used custom MIDI mapping in a DAW or other program, the concept should be familiar. Mapped parameter values can be changed directly from a MIDI controller, without routing MIDI messages through Max objects.
Mapping uses object Parameters under the hood, so any Max object with a float, integer, or enum parameter can be mapped. Detail on the individual mappings is provided in the ‘Show Mappings’ sidebar pane. Mappings are specific to individual patchers, and are not global Max preferences. Mapping is also not available within the Max for Live context.
MIDI Mapping
Enable MIDI mapping by clicking the Assign MIDI Map button in the bottom toolbar.

The whole patcher view should get a purple border, and any MIDI-mappable objects will get a purple hue as well. Objects that have Parameter Mode enabled will be solid purple and ready for mapping. Objects that could have parameter mode enabled will have a dashed purple outline, and you can click on these to enable MIDI mapping.
There's a shortcut to assign a MIDI map for any UI object: right-click on the object and select Assign MIDI Map from the contextual menu.
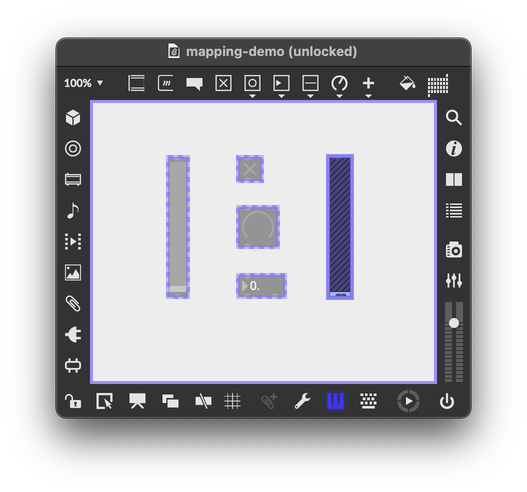
Click on any mapping-ready object to focus it, then use any connected MIDI device to send a control change or note message. You should see the value of the object change, and the top-right corner of the object will show a solid blue box to indicate an active mapping. You can also open the Mappings Sidebar to verify that your MIDI message was mapped to the object.
You can also shift focus between mapping-ready objects by hitting the tab key.
MIDI Setup
You can configure which MIDI ports participate in mapping using the MIDI Setup window. If the value in the Map column is enabled, then Max will listen to MIDI messages from that port when in MIDI mapping mode.
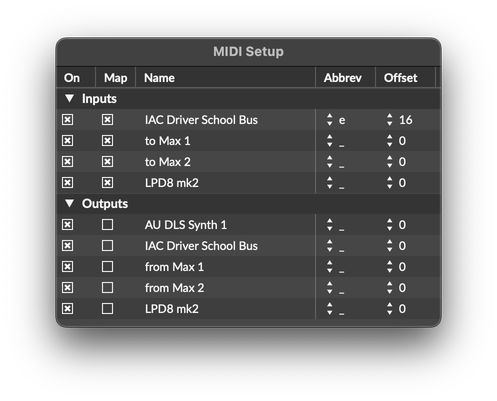
By default, Map is enabled for all MIDI inputs (for devices sending MIDI to Max) and disabled for all MIDI outputs (where Max sends MIDI to an output port).
MIDI Output and Mapping
If you choose to enable Map for a MIDI output port, then any MIDI-mapped UI object will automatically send MIDI control change or note events to that port. You don't need a midiout, cltout, or noteout object. The specific controller number or note pitch that the UI object will send depends on how the object is mapped.
As concerns MIDI output mapping, A subtle but potentially important consideration has to do with what caused the object's value to change. Value changes produced by a MIDI or Key mapping will send a final value at the completion of the event, after Max has finished processing the event. However, value changes from other sources (clicking on a UI object, or sending it a message) will produce events as they occur.
Key Mapping
Key mapping works similarly to MIDI mapping. Enable key mapping by pressing the Assign Key Map button in the bottom toolbar.

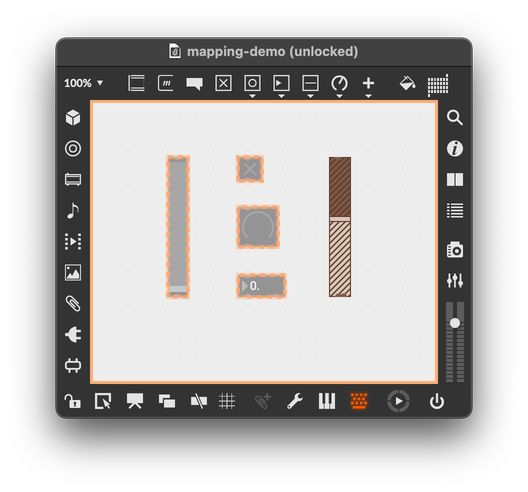
The patcher view will get an orange border, and objects that support a key mapping will get an orange hue. Just like for MIDI mapping, a dashed orange line means that you need to click on the object to enable key mapping (by turning on Parameter mode for that object).
Deleting Maps
- With MIDI or Key mapping active, select an object and press the delete key to remove the mapping.
- You can also delete the mapping using the Mappings Sidebar.
Editing Maps
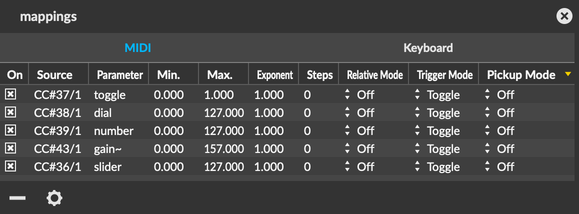
View and edit all of the mappings in the current patcher by opening the Mappings Sidebar.
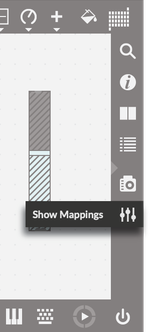
All of the mappings will be visible here, organized into MIDI and Keyboard tabs. You can customize the behavior of each mapping by editing the row in the table corresponding to your that mapping.
Min, Max, Exponent, and Steps
These values change how the input, whether keyboard or MIDI, maps to the object parameter. The values min and max refer to the min and max of the mapping itself, rather than the parameter, so they can have any value between the minimum and maximum value of the parameter. If you set min to a value greater than max, then the map will be inverted, with larger MIDI values corresponding to smaller parameter values. The exponent value lets you adjust the curvature of the mapping, giving you more fine-grained control towards the upper or lower end of the input value. The steps value lets you divide the input value into discrete steps.
A Max parameter also has min, max, exponent, and steps, but these don't have to match the values of min, max, exponent, and steps for the mapping. Your parameter could, for example, have an exponent of 1, while the input mapping has an exponent of 3.
Relative Mode
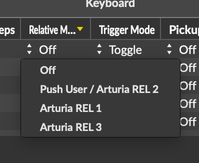
Relative Mode affects the behavior of a mapped value when using an endless rotary encoder. If you're mapping from a fixed-position knob or slider — common on most MIDI controllers — you shouldn't need to change the relative mode. If you are using a controller like the Ableton Push, which uses endless rotary encoders, one of the Relative Mode options should correspond to the output of your device:
| Mode | Description |
|---|---|
| Off | The controller sends absolute values, relative mode is off. |
| Push User / Arturia REL 2 | Positive change is indicated by values > 0; negative change by values <= 127. Zero (no change) is 0. |
| Arturia REL 1 | Positive change is indicated by values > 64; negative change by values <= 63. Zero (no change) is 64. |
| Arturia REL 3 | Positive change is indicated by values > 16; negative change by values <= 15. Zero (no change) is 16. |
Trigger Mode
Trigger Mode sets the way the object will respond to trigger-like events. Note-on events and key-down events are trigger-like — Max will treat the note on/key down event as the start of the trigger, and the note-off/key-up event as the end.
| Mode | Description |
|---|---|
| Toggle | The value toggles between minimum and maximum. |
| Momentary Switch | The value stays at maximum until the event is completed. |
| Cycle | The value toggles between several options. |
| Bang | The object is treated as if it had received a bang message. |
Pickup Mode
Pickup mode changes the way the mapped object behaves when the MIDI controller gets out of sync with the parameter value of the object. One way this could happen is if you click on a MIDI-mapped object to override its current value. In this case, pickup mode determines how the object will handle new MIDI values, until the two get back in sync.
| Mode | Description |
|---|---|
| Off | The received MIDI value is treated like an absolute value, and the object will jump to the new value. |
| Pickup | The object will ignore incoming MIDI values until they cross over the current value of the object. |
| Scale | Incoming MIDI values will scale the parameter value between its current value and the minimum or maximum value, until the object reaches its minimum or maximum. |
Saving/Loading Maps
Click on the Mappings Advanced Options button to reveal the Advanced options.
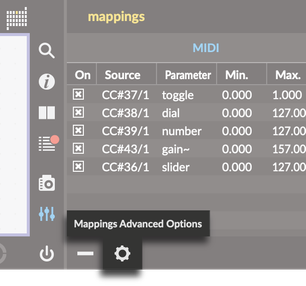
From here, click Save Mappings to File to save the current mapping configuration, and select Load Mappings from File to restore