Objects
In Max, you define the behavior of a patcher by connecting together objects. Each object has a unique character, defined by its name. If you're familiar with programming, you can think of an object's name as its class name. Objects are connected to each other by patch cords, which define how messages and data flow between objects.
Creating an Object
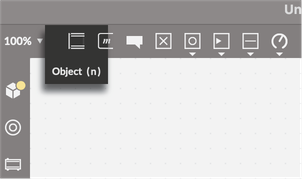
You can create a new object in any unlocked patcher by pressing the n key, or by double clicking, or by dragging in a new object box from the top toolbar.
Autocomplete
Once you've created a new, empty object, simply start typing into the new object box. Autocomplete should appear, showing you the names of Max objects that are a close match for your text. Once you've found the name of the object you want to create, press enter or click outside of the object box to finalize your text.
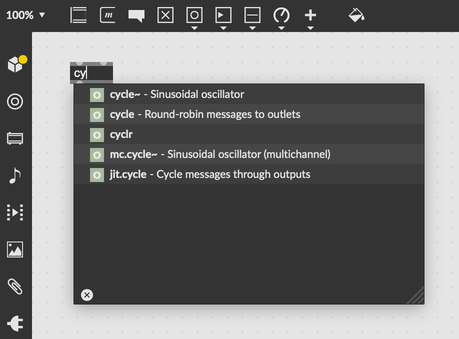
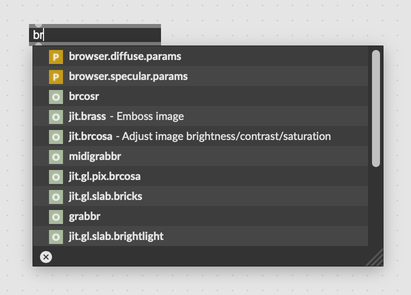
The small icons to the left of the object name in the autocomplete box tell you what kind of object matches the current object text. Most of the time, you'll see an o, indicating an object. Object boxes can also reference abstractions, and if you start to type the name of an abstraction, you'll see a p icon instead of the usual o.
Creating UI objects
Some objects, like sliders, dials, and level meters, are user interface or UI Objects. These objects don't look like most objects, instead they have a custom way of being drawn that's unique to each one. They may also define some kind of interaction behavior, where clicking and dragging on the object may have some effect. For example clicking and dragging on a dial will change its value and cause it to send that value as a message.
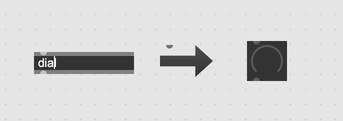
You can create UI objects in the same way as other objects. Create a new object box and type the name of the UI object into the box. As soon as you finalize the object's text, Max will replace the generic object box with the custom UI display.
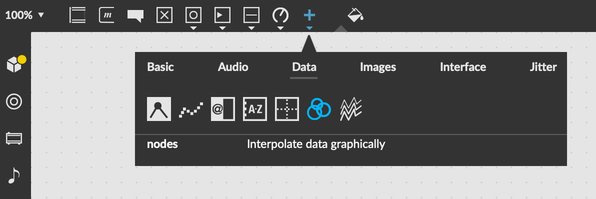
You can also use the top toolbar to create UI objects. In fact, the top toolbar contains a large palette of available UI objects. By clicking in the top toolbar, you can find simple interaction objects like sliders and dials, audio UI objects like gain controls and level meters, and widgets like a step sequencer interface. Click on any of these to create a new object in your patcher, or drag and drop the object to position it exactly where you want.
Resizing objects
When you select an object, resize handles will appear at the object's corners. Click and drag on these to resize the object. For UI objects, you can hold down the shift key to lock the object's aspect ratio as you resize it. For regular text objects, holding down shift will let you change the font size by dragging. This is especially useful for comment objects. Finally, with an object selected, you can select the "Fix Width" option (command-j on MacOS, control-j on Windows) to shrink the object to just fit its text contents.
Editing object text
You can edit the text of an existing object by selecting the object and pressing return, or by double-clicking on the object (the patcher must be unlocked). Changing the text of an object will usually replace the original object with a new instance, resetting the internal state of the object to its original values.
If you need to use special characters in a object's text box, for example a comma or a quotation mark, you can use the escape rules for special characters. See messages for more information.
Help Files and Reference
Every object has an associated help file, which describes the object's use and demonstrates its behavior. You can open the help file for an object by holding option and clicking on it, or by right-clicking on the object and selecting Open Help from the contextual menu.
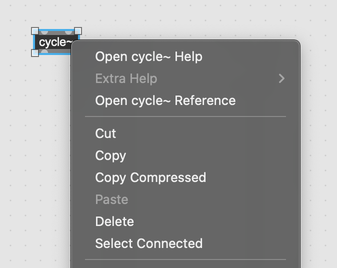
Every object also has an Object Reference Page, which completely describes the object's behavior.
- A short and long description of the object's functionality
- The Arguments and attributes that can configure the object
- The symbols that the object understands
- Other related object and documentation
Arguments
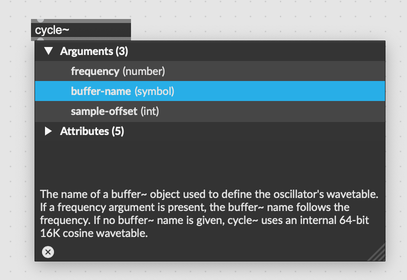
Some objects take arguments that initialize their state and further define their behavior. For example, the object cycle~ can take three arguments, the first of which defines its initial frequency. Once you've typed the name of an object into an object box, hit space to start typing the object's arguments. The autocomplete should update to show the possible arguments for the object.
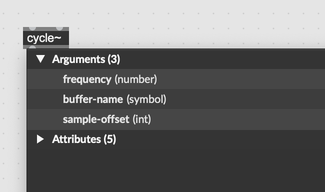
You can also click on the name of a particular argument to get more information about what that argument actually does. Clicking on the buffer-name argument for the cycle~ object, for example, shows some explanatory text about that argument.
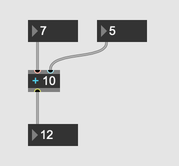
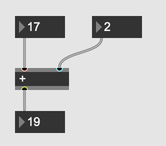
The arguments to an object are used to initialize it, and do not reflect the current state of an object. This is a quirk of working with Max that can be confusing to new users. As a classic example, sending a message to the right inlet of a + object will change its behavior, but not its appearance.
A more subtle point is that arguments might not map easily to something internal to the object that can be changed after the object is created. For example, the arguments to a gate object change the number of inlets, and there's no way to update this value after creating the object. This makes arguments different from attributes, most of which can be modified in the inspector.
Arguments are almost always optional, but some objects do require arguments to initialize correctly.
Attributes
Attributes are similar to arguments, except unlike object arguments, attributes can appear in any order, but must be identified by their name. In the text of an object box, attributes always come after arguments. Attribute names are prefixed with the @ symbol, so an object box with the text cycle~ @frequency 440 will create a cycle~ object with the frequency 440. Attributes are especially useful for complex objects with lots of configuration options. A classic example is jit.grab, which gets video from a camera device. This object has lots of configuration options, including the size and format of the video stream. Attributes make it possible to define the state of a complex object using only the object's text.
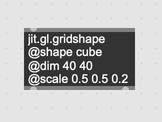
Inspecting attributes
Most attributes come with a default setter method, meaning the attribute can be set by sending the object a message with the name of the attribute and its new value. For example, you can set the @bgcolor attribute on a toggle object by sending it a message starting with bgcolor.
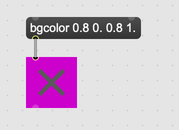
Object attributes can also be viewed and modified in the patcher using the attrui and getattr objects. Connect an attrui to an object to get a dynamic dropdown with all of that objects attributes. Use getattr to listen to the state of attributes as the change.
Finally, select an object and open the Inspector to see and filter all of an object's attributes at once. This is also the place for freezing attributes, especially handy for saving the state of changed attributes.
Inlets and Outlets
Almost all objects have at least one inlet or outlet. Objects connect to each other via Patcher Cords, where a patch cord always connects the outlet of one object to the inlet of another. Some objects have many inlets or outlets, and sometimes the way an object is configured can change the number of inlets or outlets that it has.
The way that an object responds to a message will usually depend on the inlet that receives the message. For example, the first inlet to a gate object lets you set the active outlet, and the second inlet receives messages to be routed to the active outlet.
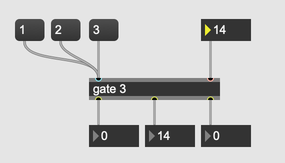
Inlets actually come in two kinds: hot and cold. Hot Inlets will trigger output whenever they receive a message input, while Cold Inlets do not trigger output, and instead change something about the object's state. The gate object is a good example—you can see that the left inlet has a blue hue, while the right inlet has a pinkish tint. Math objects are another classic example, where the cold right inlet changes how the object acts but does not trigger computation, while the left inlet makes the computation happen.
With the patcher unlocked, you can hover over any inlet or outlet to see a quick explanation of its behavior.
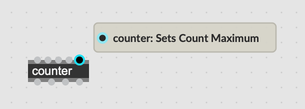
If you're making a subpatcher or an abstraction, you can set the @comment attribute to add your own description that will display when you hover over the inlet or outlet. See subpatcher inlets and outlets for more information.
Viewing messages and attributes (Quickref)
Right-click on an object inlet (or hold control and click) to see the Quickref for that object. This is a short list of all of the attributes that the object has, and all of the messages that it will respond to. This can be an extremely useful way to remind yourself how to work with an object, without needing to open its help file.
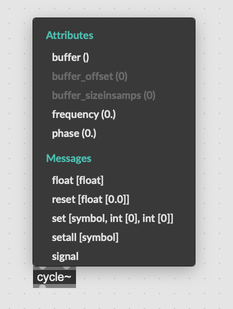
Click on any of these to create a new object in the patcher for controlling that attribute or message. Clicking on a message will create a message box that can send a formatted message to the object. Clicking on an attribute will create an attrui object that will let you change that attribute.

Action Menu
Hover over the left edge of an object to show the Action Menu button. Click on this button to show the Action Menu, which lets you transform and manipulate the object in several useful ways. For more, see the action menu documentation page.

Annotations and Hints
When you hover over a Max object, the Clue Tab will display information about that object. You can customize the text that Max displays here by setting the @annotation attribute for a given object.

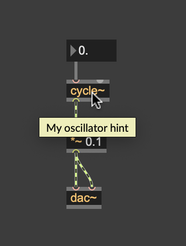
You can also set the @hint attribute on an object, which will add an "alt-text" style text pop-up that will display when you hover over the object. This text will only appear if the patcher is locked.
