Recording and Exporting
Recording Audio
When it comes to recording the audio output of your patcher, Max tries to give you lots of options to best fit your needs. Global Record is a simple "one-button" recording option suitable for most everyday recording. If you need a little bit more control, or you want to record more than two channels, you can use the Quickrecord extra. For programmatic recording, and for recording more than eight channels, you can use the sfrecord~ object, or export directly from a buffer~ object.
File formats
Max objects can save audio to aiff, wave, ogg, flac, or raw formats. To record to an mp3 or an m4a, export your audio from Max, and then process the result. Many programs can compress and convert audio; ffmpeg is a popular and free tool.
Global Record
When you want to record the output of your patcher, just click the Global Record button in the right toolbar.
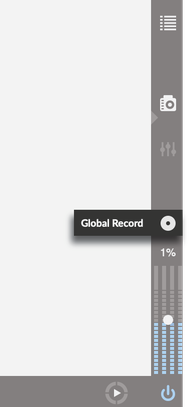
This will immediately start recording the first two channels of all patchers to a new audio file. The Global Record button will change appearance while recording is taking place. If you want to see an animating red dot, instead of a filled white circle, enable the Global Record Red Button in Max's recording preferences.
Global Record will record to a folder named Recordings in the Max 9 Folder.
Quickrecord
The Quickrecord extra also records the audio output of the Max application. You can open the Quickrecord extra by selecting Quickrecord from the Extras menu. Under the hood, this extra uses the adoutput~ object, which acts as a tap into Max's audio output.
Recording to a directory
By default, Quickrecored will record to a directory. You can press the Choose a directory button to select which directory Max should record to. When you do, you'll see the menu illuminate under the Choose a directory button.
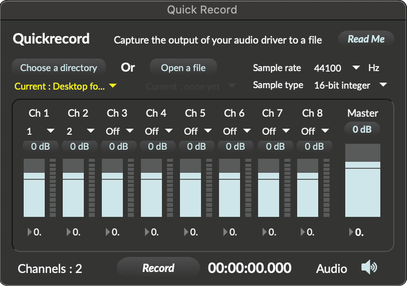
Every time you press the Record button, Max will add a new recording to the directory that you've selected. Max will format the name of the recording to reflect the date and time when you started the recording.

Remember to press the Record button again when you're done to stop the recording. This is necessary to finalize the audio file.
Recording to a file
Click on the Open a file button to select a file to which you'd like to record. Once you've picked a file, you'll see the user interface update to show the name of the file that you've chosen. You can click on the illuminated menu under the Open a file button to see where your file will be recorded.
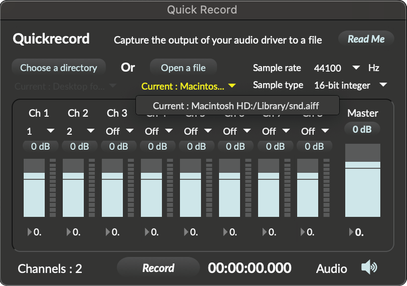
If you start recording again without opening a new file, Max will record over your original recording.
Multichannel
Quickrecord can record up to eight channels simultaneously. However, by default only the first two audio channels are enabled. In order to enable the other audio channels for recording, use the drop down menu under each channel to map each channel from Max to a channel in the recording.
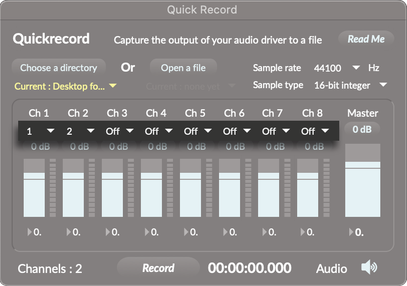
Each channel strip in the Quickrecord view represents a different channel in the recorded audio file. Using the menus in each channel strip, you can map an audio output from Max to each recorded channel. The default configuration maps output channel 1 to recording channel 1, and output channel 2 to recording channel 2. Set any channel to Off to disable recording to that channel.
Using sfrecord~
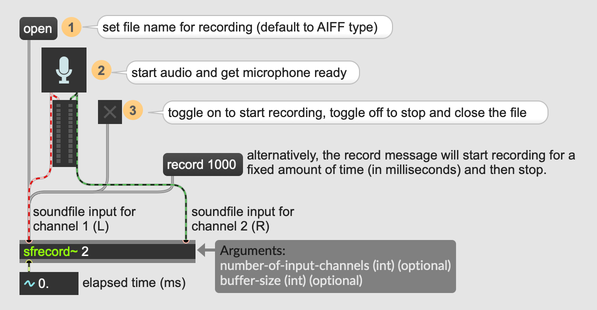
The sfrecord~ object (and the mc.sfrecord~ object) is the programmatic interface to recording in Max. Each sfrecord~ object can record up to 64 channels at once, and multiple sfrecord~ objects can be active at the same time.
Using buffer~
The record~ object can record directly to the contents of a buffer~ object, letting you record to memory in Max without saving your audio to disk. You can also use the poke~ object to write samples directly into a buffer~. Either way, after getting samples into a buffer~, you can send buffer~ a write messages to save the contents of the buffer to disk.
Recording Video
For a full discussion of video recording, see this Jitter documentation on Recording Video.