Styles
A Style is a collection of colors and fonts used by Max user interface objects. You can apply a style to a Max patcher as a whole or to an individual object. A patcher-level style establishes defaults for colors and/or fonts that can be overridden by styles or colors applied to individual objects. You can define your own personal library of styles or make use of "factory styles" that come with Max. You can also use styles in connection with Max templates to create your own unique default patching environment.
Styles are created and managed using the Format palette.
Applying a Style to Objects
Select any number of objects, then click the Format button to open up the Format palette toolbar.

Click on the style menu in the top toolbar to to show the available styles.
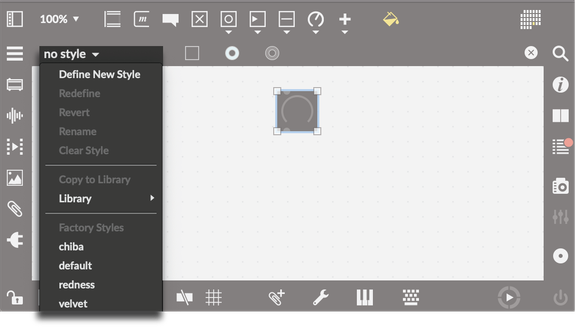
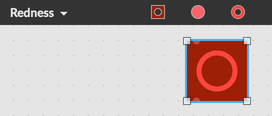
The style menu lets you choose from styles you have created and added to your own Max library (available using the Library entry), styles recently used in the current patcher (which will be listed just below the Library entry), or from Max Factory Styles (located at the bottom of the menu). Choose any of these styles from the pull-down menu. The menu will display the current style, and that style will be applied to your objects.
Applying a Style to a Patcher
It's also possible to apply a patcher-level style. A patcher-level style establishes default colors and fonts for new objects. To apply a style to the whole patcher, first make sure no object is selected by clicking in the background of the current patcher, then click on the Format button to open the Format palette toolbar.

Once more, click on the style menu on the left-hand side of the toolbar to show the style menu.

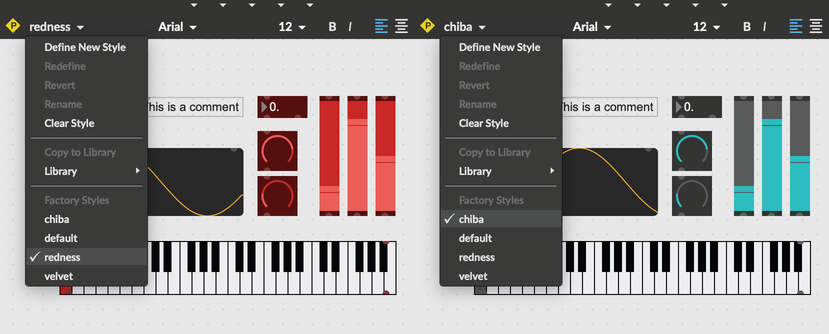
Choose a style to apply a patcher-level style. If an object is using its default colors and fonts, the patcher-level style will replace the default values. This lets you change the look of a whole patcher at once.
Accessing Style Colors from JavaScript
Inside a JavaScript object like v8, v8ui, or v8.codebox, you can access style colors using the associated properties on the this.patcher object. For example, this.patcher.bgcolor will return the background color defined in the currently active style (or inhereted from the current theme, if no style is active). If you're using this color with a custom UI object, it's recommended to fetch this color in your paint() method. Since paint() is called automatically whenever the style changes, this guaranetees that your paint() function will always be called with up-to-date colors from the current style.
Creating a New Style
In the same way that you can apply a style either to a selection of objects, or at the patcher level, you can also create a style in the same way. In general, it's easiest to create a style based on a selection of objects.
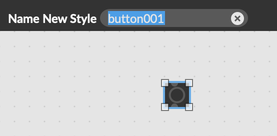
Select the object (or objects) that you'd like to use as the basis of your new style, then click on the Format button to open up the Format palette toolbar. Configure the object as you want it to appear in your new style, then click on the style drop down and select Define New Style.
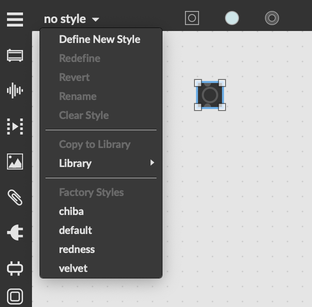
This will open a dialog box that lets you name your new style.
Attributes included in a style
Not all attributes that affect the appearance of an object can be included in a style. It's easy to see which attributes will be included by looking at the format palette, which shows all the attributes that can participate in a style. By clicking on each icon in the toolbar, you can see the name of each attribute, as well as the name of the color theme value that affects that attribute. For example, a button object has an attribute called outlinecolor, and from the format palette you can see that this is affected by the color theme value elementcolor. This helps you see how the style of one object can apply to multiple objects, when creating a style from a single object.
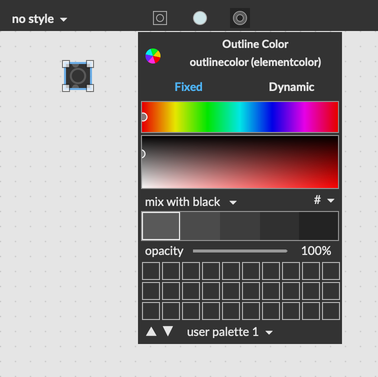
It's also important to note that a style will only include attributes that you've changes from their default. If you leave an attribute at its default value, then any style defined from that object will not include that value.
Single-object styles
When using a single object to define a style, Max will use the color theme value of a particular attribute to determine how to style other objects based on the original objects. Using the example of a button object, since the outlinecolor attribute is affected by the color theme value elementcolor, the outlinecolor of a button will affect the "Off Color" of a slider object with the same theme.
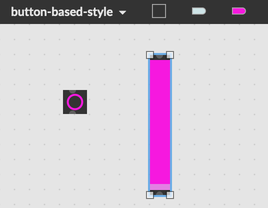
In the above, the appearance of the slider with the style "button-based-style" is determined by the appearance of the button.
Multi-object styles
When using multiple objects to define a style, Max will only apply the style to objects of the same class as the original objects. If you define a new style based on a button and a slider, then buttons will have the same appearance as the button, and sliders will have the same appearance as the slider, but other objects will be unaffected.
Removing a Style from an Object
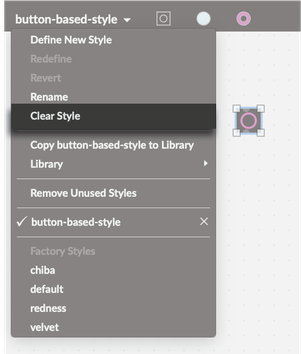
Select the object, then open the style menu and select "Clear Style".
Adding a Style to your Library
A Library Style is dependency-free, saved to disk, and does not rely on any other styles.
- To add a Library Style, click on an empty section of a patcher, then click on the Format Button to open the Format palette toolbar. Select the style for your patcher that you want to save to the Library.
- Click on the style menu and choose Copy
<style name>to Library from the pull-down menu.
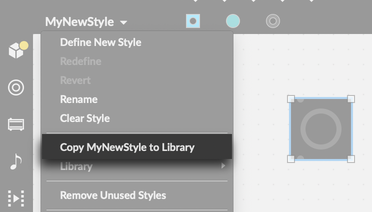
The style you have selected will now appear in the Library tab of the Style menu
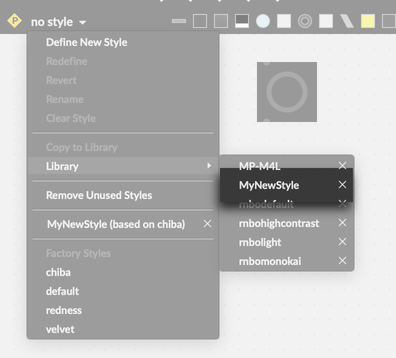
Library styles can be found at ~/Documents/Max 8/Styles on a macOS, and %HOMEPATH%\Documents\Max 8\Styles on a Windows system.
Removing a Style from your Library
- Click on an empty section of a patcher, then click on the Format Button to open the Format palette toolbar.
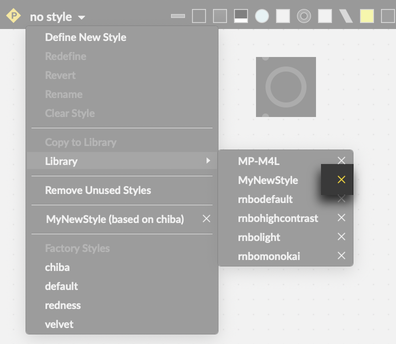
- Click on the style menu on the left-hand side of the Format palette toolbar and hover over the Library menu entry. This will display all of the styles you have added to the Library.
- Click on the deletion button to remove a specific style.
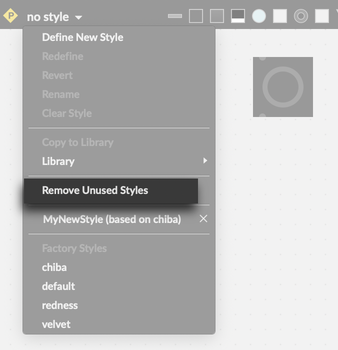
- To remove all styles that are not being used in a patcher, select Remove Unused Styles from the style menu. This will removed all unsed styles that may have been inherited from copying and pasting a different user's patcher, or opening a different user's patcher on your machine.
Modifying a Style
- Click on an empty section of a patcher, then click on the Format Button to open the Format palette toolbar. Use the Format palette to make your desired changes to the object. When you do, you will notice that a plus sign appears alongside the current style in the style menu to indicate that the style has been changed.
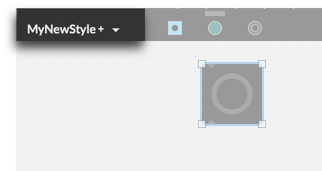
- Click on the style menu on the left-hand side of the Format palette toolbar. Making changes in an object with a style applied to it will enable several menu options in the pull-down menu.
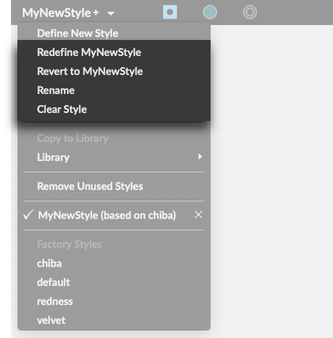
- Choose Redefine to redefine the current style to match your changes.
- Choose Revert to revert to the style you originally applied to the object.
- Choose Rename to rename the style you originally applied to the object. When you choose this option, the style dialog will appear. Type in the name of your style. When you hit a carriage return, the style will be created and be added to a list of patcher styles.
- Choose Clear Style to return the attributes of the object to their default state (precisely as if you had selected Set to Default Values from Max's Object menu).