Action Menu
The Action Menu lets you explore, transform, and interact with objects in your patcher. It groups together common operations on an object, like viewing its attributes or messages. It also gives you access to Transformations, which are a powerful way to refactor your patcher.
Viewing the Action Menu
With the patcher unlocked, hover near the middle-left side of the object until a green arrow appears.

Click the arrow to reveal the action menu.
Parts of the Action Menu

| Name | Description |
|---|---|
| Attributes | Lists the current state of all the object's attributes. Select an attribute from the Attributes submenu to create an attrui object attached to the object, configured with the given attribute. |
| Messages | Select a message from the Messages submenu to create a message box attached to the object containing the given message. You'll typically want to type in an argument after the message name in the newly created message box. |
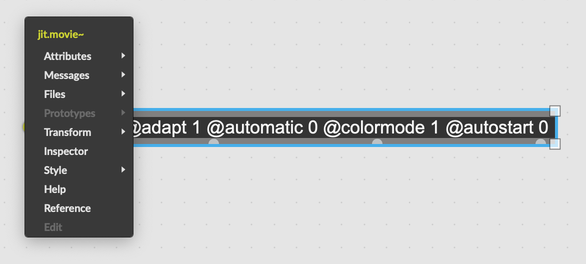
| Files | If the object can read in a file, like sfplay~ or jit.movie~, then this option will list all compatible files in Max's search path. Selecting any one will load that file into the object. |
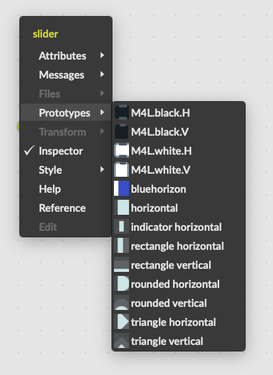
| Prototypes | Select a prototype from the submenu to replace the object with a new version containing a collection of attributes. See prototypes. |
| Apply Changes | Choose a prototype from the submenu to apply the collection of attributes to the object. See prototypes. |
| Connect | (UI objects only.) Assign a connectable parameter. See Connecting Parameters. |
| Transform | Transformations defined for this object. See transform. |
| Inspector | Open the inspector for this object. |
| Style | Choose a style for this object. |
| Help | Open the help patcher for this object. |
| Reference | Open the object reference for this object. |
| Edit | Perform the same action as double-clicking on the object. For example js and coll open a text editor to edit their contents. MIDI objects such as noteout display a menu of MIDI ports. |
Additions
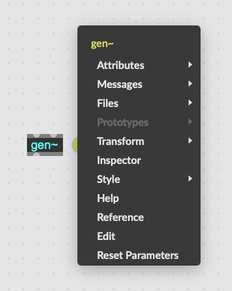
Some objects, like gen~ for example, may add their own actions to the action menu. In this case, gen~ adds the "Reset Parameters" option which, as you might expect, resets all the parameters of the gen~ object in question.

Using the Action Menu
The action menu provides quick access to two of the most powerful ways to modify an object in place: transforms and prototypes.
Transform
Transformations let you change the way an object is represented, without changing its behavior. Usually you'd do this because it's more convenient to work with an object in a different representation.
Transform > Changed Attributes to Arguments

This option takes all of the attributes on the given object that have been modified from their original state, and includes them as initial attribute values in the object box. This can be a useful alternative to freezing attributes, and is a handy way to "lock in" the current state of an object.
Transform > Multi Channel Version / Single Channel Version

Convert between single- and multi-channel versions of an MSP object. Usually this will involve adding or removing the mc. prefix.
Transform > Patcher to Bpatcher

This extremely useful option converts a subpatcher to a bpatcher. If you end up adding interface controls to a subpatcher, this is a great way to expose the presentation view of your subpatcher at the top level.
Prototype

Prototypes store configurations of a given object, such as the range and colors of a slider. Choosing an item from the Prototype submenu replaces the object with the prototype. Choosing an item from the Apply Changes submenu updates the existing object with the changed attributes stored in the prototype file.