Graphics Processing
Whether you're using 3D modeling software, a game engine, or writing your own shaders, creating and displaying Computer Graphics invovles many of the same concepts. Max has many capabilities when it comes to working with computer graphics, and this document will describe how to make use of them.
Graphics Contexts
In order to draw, you must have some place to draw to. The Max object jit.world is the simplest way to get a graphics context. This object wraps together many other, lower level objects. The two most important of these objects are jit.window, which creates a graphics context in a separate window, and jit.gl.render, which can be used to direct Max to render a single frame of graphics.
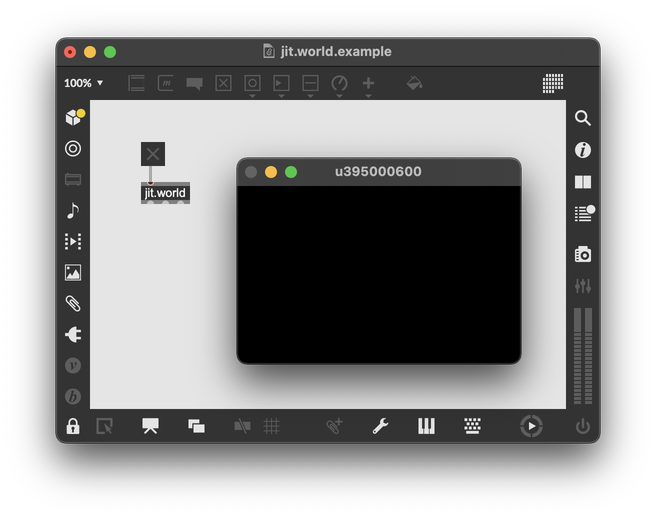
While jit.world creates a separate window, you can also use the jit.pworld object, which has similar functionality as jit.world, except the graphics context appears as a frame in the Max patcher.
Context names
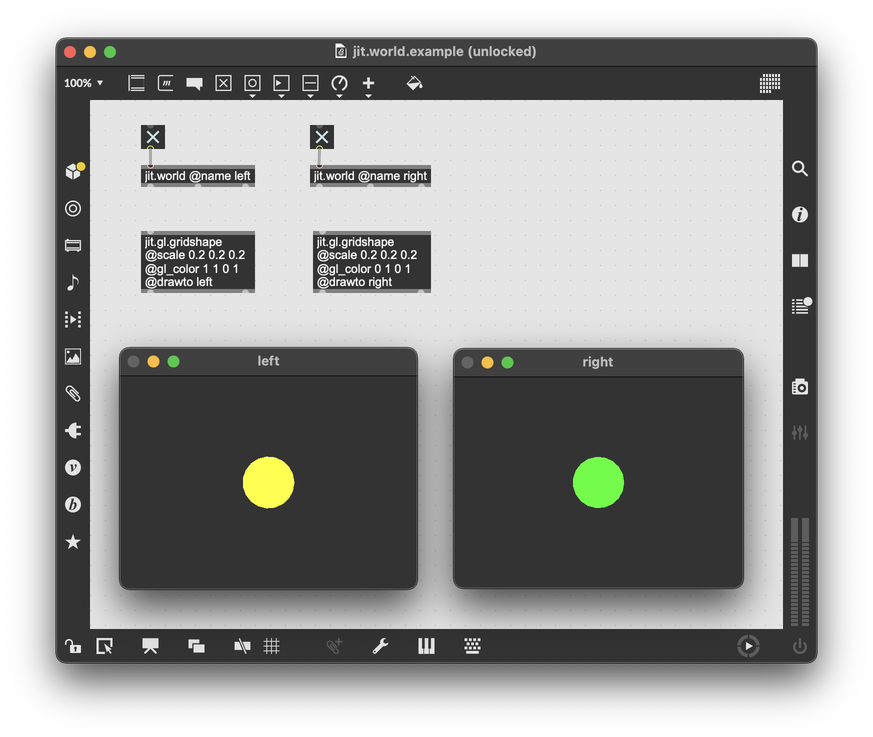
Unlike some Max objects, Jitter objects that deal with graphics processing don't need to connect to each other to pass data around. Most graphics processing objects (usually with the jit.gl prefix) refer to their parent context by name. Even if you don't assign an explicit name to your graphics context using the @name attribute, Max will create a unique name automatically when you create it. If you add a graphics processing object to your patcher, by default it will bind to whatever graphics context is available in the current patcher. However, if you have multiple graphics contexts in a single patcher, you can use an attribute to bind the object specifically to a particular context. Most objects use the @drawto attribute to choose their parent context explicitly. An alternative way to set @drawto is to provide the context name as the first argument following the object name.
Offscreen contexts
It is possible to hide the window created by jit.world using the @visible attribute. However, the best way to create an offscreen context is with the jit.gl.node object. Using the @name attribute, you can give jit.gl.node a name, and then use the @drawto attribute to bind objects to the jit.gl.node. Finally, enable texture capture with @capture 1 on the jit.gl.node object. In this configuration, the jit.gl.node object functions as an offscreen render target. The output of jit.gl.node will be a texture to which you can add postprocessing.
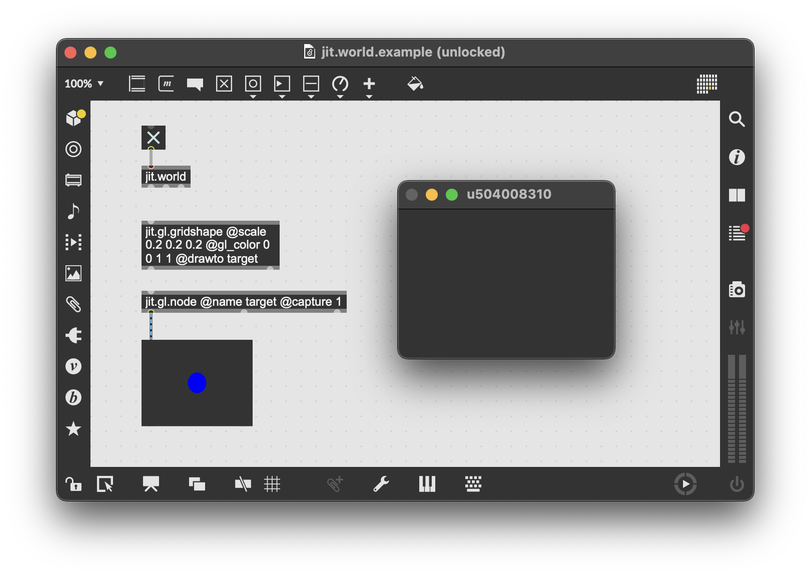
Note that here, since the jit.gl.gridshape is drawing to the context owned by jit.gl.node, the shape is not visible in the window context owned by jit.gl.world. However, for jit.gl.node to function, it must still have its own parent context. So the jit.world object must be present for this patcher to function.
Cameras
Create a camera with the jit.gl.camera object. This object has attributes for managing rendering according to perspective.
| Attribute | Type | Description |
|---|---|---|
@lookat | vec3 | Point the camera towards this position. Setting this attribute will override @direction. |
@position | vec3 | The position of the camera. Combines with @lookat to determine the orientation of the view. |
@rotatexyz | vec3 | Rotates the camera. Setting @direction or @lookat will override this, since they are all three different ways of defining the orientation of the camera. |
@near_clip | float | Only vertices further from the camera than this minimum distance will be rendered. |
@far_clip | float | Only vertices nearer to the camera than this maximum distance will be rendered. |
@lens_angle | float (degrees) | The angle between the limits of the camera's view. A narrower lens angle increases the size of visible objects, while decreasing the amount of the scene that can be seen. |
@ortho | enum (int) | Manages camera perspective. 0, the default value, imitates natural perspective vision by making more distant objects appear smaller. 1 instead uses orthographic projection, in which all objects are the same size on matter their distance. 2 is also orthorgraphic, but with a fixed lens angle. |
@tripod | bool | 1 enables tripod mode, in which the camera vertical orientation will be locked pointing upwards. Avoids unintended camera roll. |
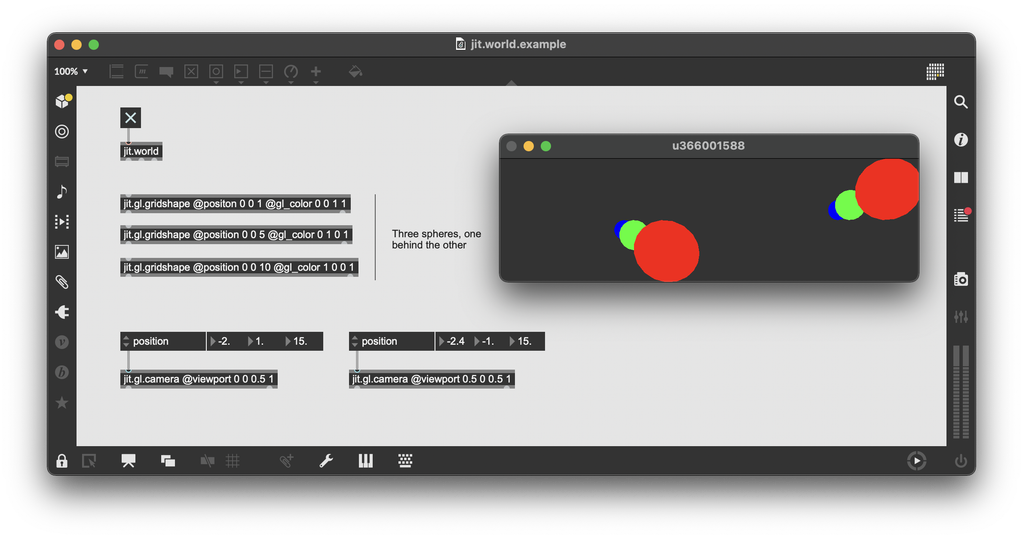
Multiple cameras can belong to the same graphics context. When rendering, each camera will render one after the other, compositing their output if blending is enabled. The @viewport attribute can be used to render the camera to only part of the graphics context.
Geometry
Special purpose objects
The easiest way to create a geometry is to use the jit.gl.gridshape object. This object generates geometry for one of several standard 3D shapes. By default, it will also render that shape to the current graphics context. The jit.gl.gridshape is one of several special purpose objects that generate procedural geometry, and which can render that geometry in the current context.
| Object | Description |
|---|---|
| jit.gl.gridshape | Generate simple geometric shapes as a grid |
| jit.gl.plato | Generate platonic solids |
| jit.gl.nurbs | Generate Non-Uniform Rational B-Spline surfaces |
| jit.gl.text3d | Generate three dimensisional text |
| jit.gl.model | Load 3D models |
| jit.gl.graph | Generate 3D graphs |
| jit.gl.sketch | State machine interface |
| jit.gl.lua | State machine interface using Lua programming |
Half-edge geometry objects
The jit.geom family of objects, like jit.geom.shape, are a specialized group of Jitter objects designed to work with Half-edge Geometry Structures. See the Jitter Geometry guide for more information.
Using @matrixoutput with jit.gl.gridshape
If you enable the @matrixoutput of jit.gl.gridshape, then the object will no longer render its shape to the current context. Instead, the procedurally generated geometry will come out of the first outlet as a matrix. The output is a Jitter matrix with multiple planes describing the geometry. The dimension of the output is equivalent to the number of points in the mesh.
| Planes | Type | Description |
|---|---|---|
| 0-2 | vec3 | Vertex position (using tri_grid order) |
| 3-4 | vec2 | Texture coordinates |
| 5-7 | vec3 | Normal vector |
| 8-11 | vec4 | Color (rgba) |
To render geometry as generated with a jit.gl.gridshape object, use the jit.gl.mesh object. By default the mesh uses a totally flat shader for rendering, so the 3D geometry from jit.gl.gridshape will appear as a flat 2D shape.
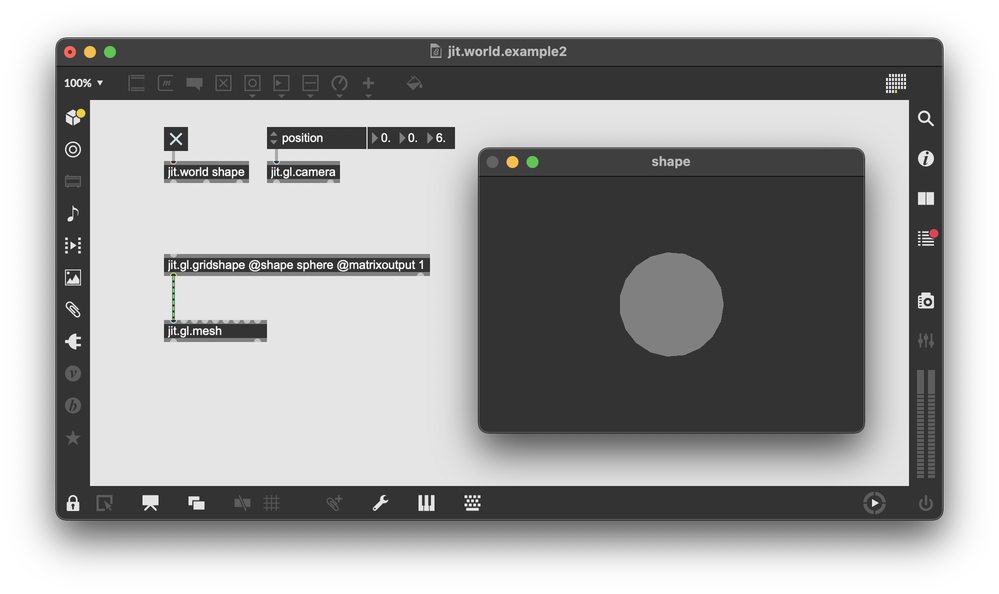
Custom geometry
In addition to using jit.gl.gridshape to generate a simple geometry from a standard list of shapes, you can also supply your own Jitter matrices to jit.gl.mesh. You can use whatever Jitter processing technique you like to generate these matrices, but one really convenient way would be to use jit.gen. This object lets you manipulate Jitter matrices on a cell-by-cell level, which will be familiar to anyone who has worked with geometry shaders before.
Processing geometry on the GPU with vertex shaders
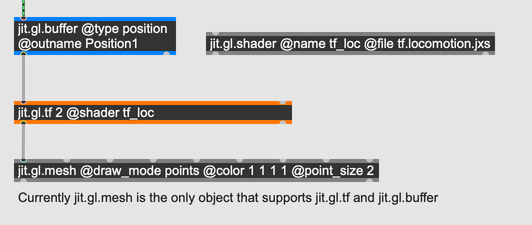
The jit.gl.gridshape and other special purpose procedural geometry objects, including jit.gen, run entirely on the CPU. Because of this, they can be slow for very large, complex, dynamic geometries. For more sophisticated geometry processing, using vertex shaders, use the jit.gl.tf object. When used in conjunction with jit.gl.buffer and jit.gl.mesh objects, along with a vertex shader held in jit.gl.shader, the jit.gl.tf object can do complex geometry processing on the GPU, with feedback.
Materials
To determine the final appearance of a 3D object, a graphics program will combine information about the object's shape with information that describes the surface of the object and how it interacts with light. This information is called the object's material. You can define the material for an object by connecting a jit.gl.material object to the target object, or by setting the @material attribute on that object.
jit.gl.material
The simplest object for working with material is jit.gl.material. This object uses a simple lighting model that assumes that the apparent color of an object is the sum of contributions from ambient, diffuse, and specular light.
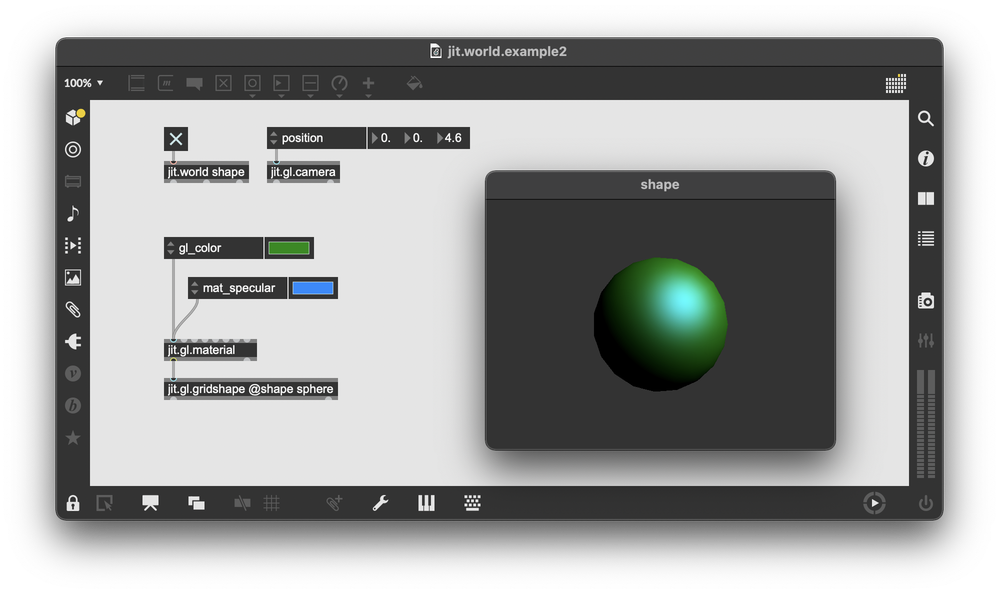
In addition to diffuse, ambient, and specular textures, the jit.gl.material object also has inputs for a custom normal map, height map, and environment map. When using a custom height map, the @heightmap_mode attribute gives access to two different ways of handling the height map. With @heightmap_mode parallax, the material will use parallax mapping to manipulate the texture map for a more realistic look. By contrast, @heightmap_mode vtf will manipulate the object's geometry, changing its silhouette and recalculating its surface normals.
jit.gl.pbr
The jit.gl.pbr object implements a more realistic material model for 3D objects (the "pbr" stands for "physically based rendering"). Unlike jit.gl.material, the pbr model uses the metalness and roughness of an object to determine how it reflects light.
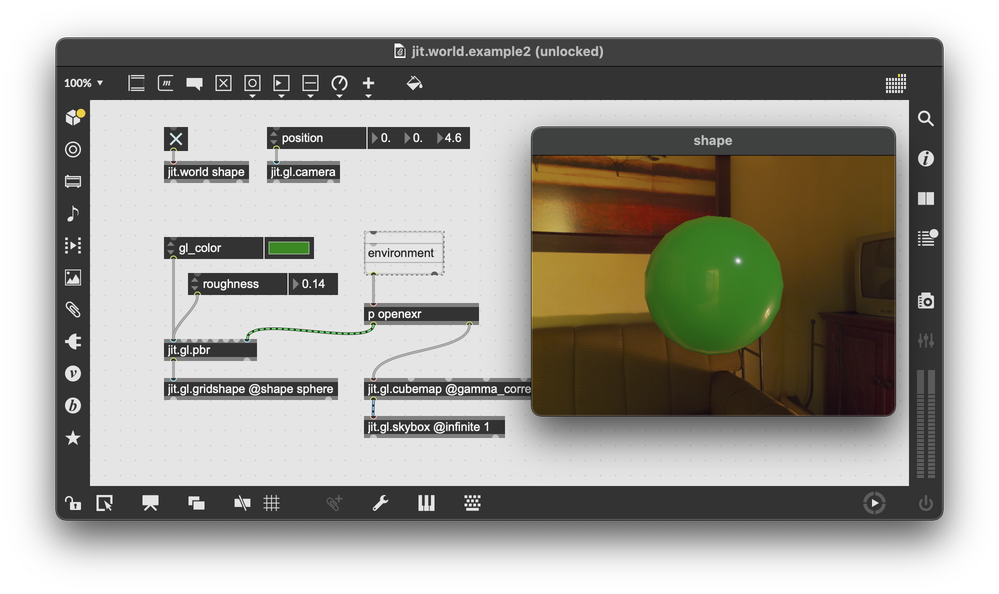
Similar to jit.gl.material, the jit.gl.pbr object can take a height map as input. The height map can be used for parallax mapping, and for recomputing surface normals. The jit.gl.pbr object can also automatically generate texture coordinates based on the geometry of the attached mesh.
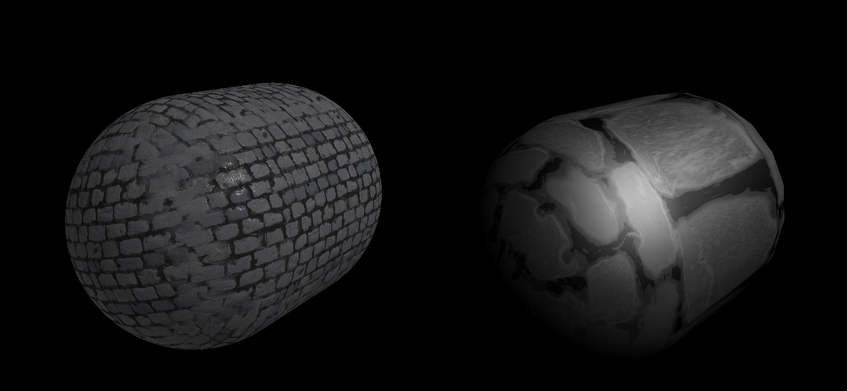
When using an environment map with jit.gl.pbr, the material can take specular highlights from the environment, greatly adding to the sense of physicality.
Lights
You can add lights to a graphics context with the jit.gl.light object. Through the @type attribute, this object supports four different standard types of lights.
| Type | Description |
|---|---|
| point | Light emitted from a single point in all directions. Similar to the light from a lightbulb. |
| directional | Light emitted as parallel rays from a distant source. Similar to light from the sun. |
| spot | Light emitted from a point in th eshape of a cone. |
| hemisphere | Light from two hemispheres. The @diffuse attribute defines the color of one hemisphere, and the @ambient attribute defines the color of the other hemisphere. |
Instancing
When rendering the same object multiple times, as when rendering snow or smoke or a flock of birds, we can gain efficiency through instancing. The idea is, we try to keep as much data as possible on the GPU (where the drawing happens), because copying data from the CPU (where we work in Max) is computationally expensive.
The first way to do instancing is with jit.gl.multiple. To multiply an object with jit.gl.multiple, connect to the object that should be instanced.
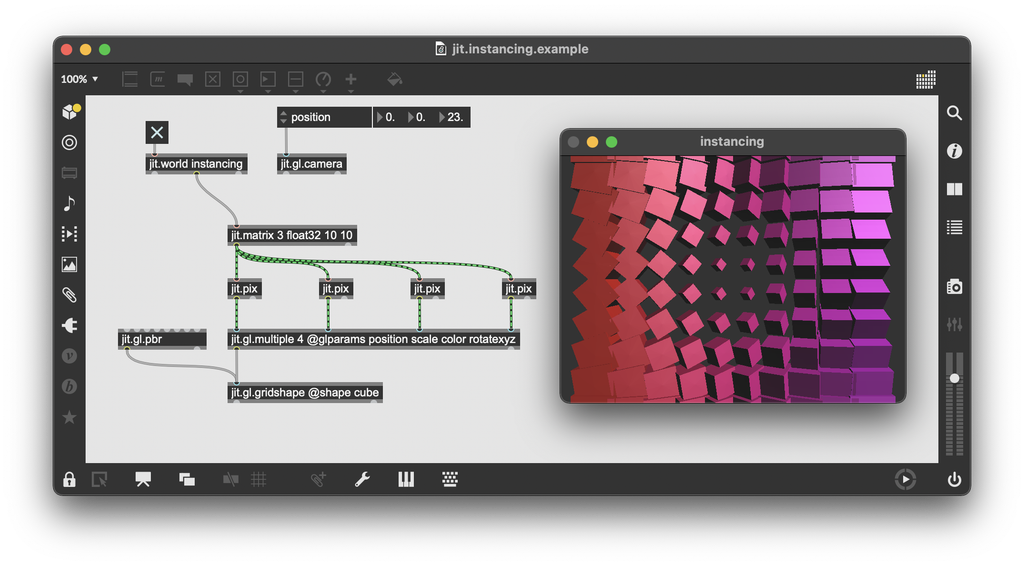
The jit.gl.multiple object takes a matrix at each input. The number of cells in the matrix determines the number of instances to create, and the data contained at each cell maps to a different parameter. This example uses simple parameters like position and scale, but it's also possible to map a different material to each instance.
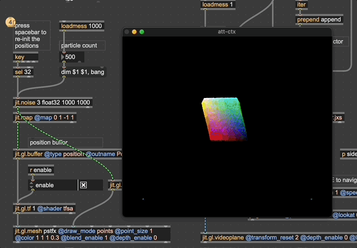
The second is with jit.gl.buffer. This object manages a named reference to a buffer of data stored on the GPU. It's analogous to jit.gl.multiple, except the data managed by jit.gl.buffer never leaves the GPU, and can be manipulated with a shader program managed by jit.gl.tf. For particle effects and simulations involving a very large number of agents that update according to simple rules as defined in a vertex shader, the objects jit.gl.buffer, jit.gl.tf, and jit.gl.mesh are the best choice.
Depth Buffer
Objects rendered in Jitter write to the depth buffer by default, which the renderer will use to draw objects on top of each other in the expected way. The attributes @depth_write, @depth_clear, and @depth_enable can be used to configure how an object interacts with the depth buffer—whether it writes to, clears, or uses the depth buffer at all. For an in-depth discussion of depth testing and layering, see the Depth Testing and Layering guide page.
You can retrieve the depth buffer using a jit.gl.pass object. A custom render pass can get a source from NORMALS, which includes both the surface normals as well as the depth for each fragment. See Render Passes for more details.
Handles
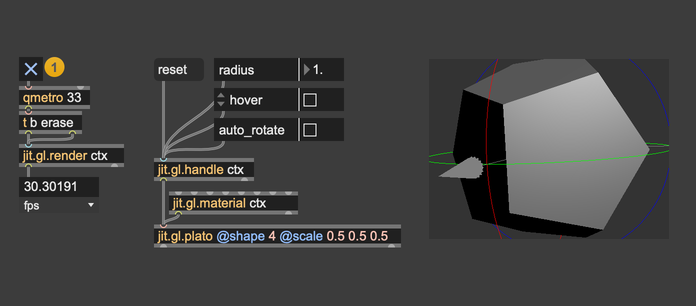
The jit.gl.handle object an bind to another Jitter object, mouse interaction with a Jitter graphics context to matrix transformations. In othre words, attach a jit.gl.handle to an object like jit.gl.gridshape if you want to click and drag on your graphics context to to rotate, scale, and move that object.
Models
Load models into your scene with the jit.gl.model object. This object can load most common model formats, like OBJ, Collada, and Blender. Check out the jit.gl.model help file for details on how to work with rigged models, how to fetch materials descriptions from the model, and how to read and play animations.