Patching
The word patching describes everything that you do as part of creating a Max patcher, including adding, positioning, configuring, and connecting objects.
Locking/Unlocking
A new Max patcher is unlocked by default. Unlocking a patcher is also called putting the patcher in edit mode.. When unlocked, you can use the mouse and keyboard to create, delete, move, and connect objects. You can click and drag in the background of a patcher to start a selection, and drag to select multiple objects.
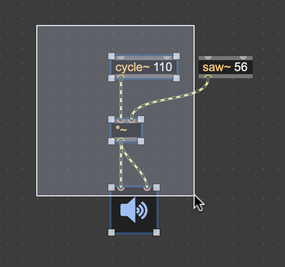
When the patcher is locked, you can no longer modify objects using the mouse and keyboard (you can still edit the patcher via scripting). Instead, you can operate user interface (UI) objects (sliders, dials, buttons, etc.) by clicking and dragging on them. You could say that you unlock a patcher to work on it, and then lock the patcher to perform with it.
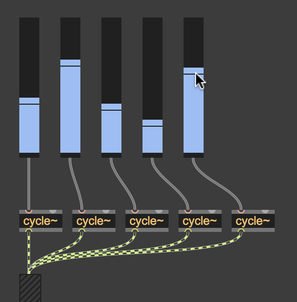
While the patcher is unlocked, you can still operate UI objects as if the patcher were locked by holding the ⌘ (macOS) key or the CTRL (Windows) key. This is convenient if you want to adjust an object quickly without locking.
You can lock the patcher by clicking the Lock icon in the bottom toolbar, or by selecting Edit from the View menu.
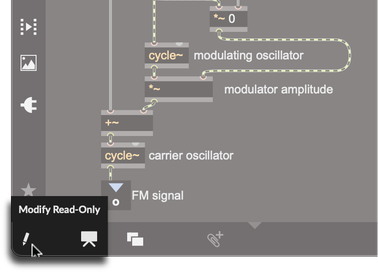
Modify read-only
If you open an abstraction, or if you're viewing the contents of a bpatcher, poly~, pfft~, or any other object that loads a separate patcher, the Edit icon will be disabled and replaced by the Modify read-only icon. A read-only patcher cannot be unlocked by pressing ⌘e (macOS) key or the CTRLe (Windows) key—you must click on the Modify read-only icon to unlock a read-only patcher. This is to help you avoid accidentally modifying a patcher that other patchers might depend on.
Operate While Unlocked
With Operate While Unlocked enabled, you can adjust user interface objects using the mouse even while the patcher is unlocked (in Edit mode). You can enable this mode by clicking the Operate While Unlocked icon in the bottom toolbar, or by selecting Operate While Unlocked from the View menu.
In this mode, hold down shift while clicking to select UI objects without changing their value. You can also select a UI object by clicking its border. Hold down shift and start dragging a UI object to move it, then release shift once you've started dragging.
To perform actions with UI objects that require the option key, hold down the option and ⌘ (macOS) or CTRL (Windows) keys.
Creating Objects
With the patcher unlocked, create a new object by pressing the n key, or by double clicking. You can also drag in an object from the top toolbar. Once a new object is created, keyboard focus moves to the text field in the new object.

For more on creating objects, understanding objects, and learning about objects, see the dedicated Objects page in the User Guide.
Positioning Objects
With the patcher unlocked, click and drag on an object to move it. If multiple objects are selected, the objects will move as a unit. You can also use the arrow keys to make fine adjustments, or hold shift and press the arrow keys to make large adjustments. As you move objects around your patcher, the the Clue Bar will show you how your action will affect the object's position.

Pixel alignment
If an object has a position with fractional values, it will no longer align precisely with the pixels used for display on your screen. This can cause subtle aliasing issues that can affect how objects look. One way this can happen is if you try to reposition an object while the patcher view is zoomed.
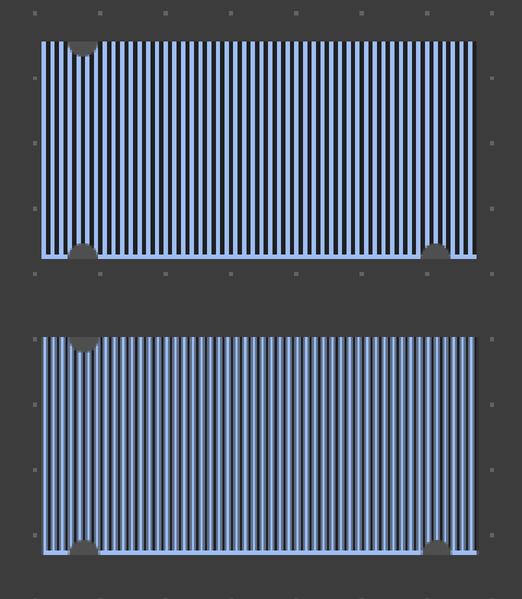
There is a patcher attribute called @integercoordinates or Snap to Pixel that enforces whole number coordinates for all objects in the patcher. You can also select any number of objects that you'd like to align to the pixel grid and select Apply Grid > Apply 1x1 Pixel Grid from the Arrange menu to move all selected objects to integer coordinates.
Copying Objects
Select a group of objects and select Copy from the Edit menu to copy them to the clipboard. Select Paste to paste those objects into the patch. You can also select Duplicate to copy-paste with a single command. Finally, you can hold option (macOS) or alt (Windows) while dragging a group of selected objects to copy them before dragging.
After you Paste or Duplicate a group of objects, you can reposition the newly created group of objects. When you do, Max will remember the offset from the original object group. This lets you quickly create a large number of evenly-spaced object groups.
- Select a group of objects
- Copy and paste (or duplicate) that group
- Reposition the pasted group
- Select Paste or Duplicate to paste a new group with the same spacing.
Copy Compressed
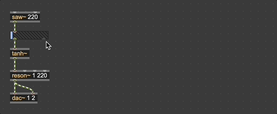
The Copy Compressed command from the Edit menu will copy a group of objects as compressed text. You can share this text anywhere, and restore the objects from compressed text simply by pasting, or by using the New From Clipboard command from the File menu. See the copy compressed section of the Sharing page for more information.
Resizing Objects
When any number of objects are selected, you can resize those objects by clicking and dragging on the white resize handles that appear. Hold shift while dragging to maintain aspect ratio while adjusting size. Note that some objects, like the toggle object, have an intrinsic aspect ratio that cannot be changed.
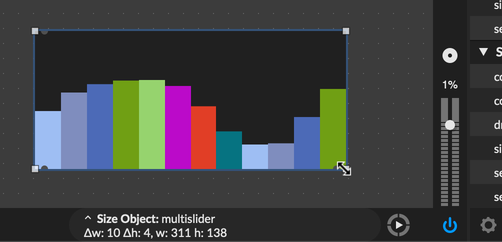
Objects that display text, like non-UI objects, comments and message boxes, have a fixed height that will not change while resizing. Instead, changing the width of the object will reflow its text. Hold shift while dragging to change the size of object's font while adjusting its width.

For text objects like comment and message, you can select Fix Width from the Object menu to adjust the width of the object to fit its text.

Patching Rectangle
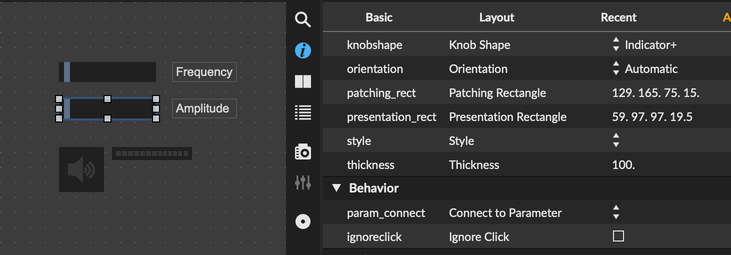
The position of an object in a patcher is called its Patching Rectangle. These four numbers determine the distance of the object from the left and top edge of the patcher, as well as its width and height. This value is also exposed as an object attribute called @patching_rect, and can be adjusted from the inspector.

Aligning Objects
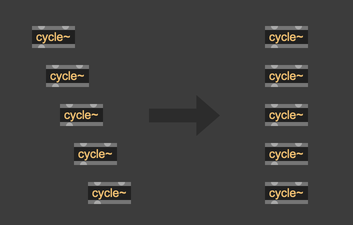
You can align objects by selecting one of the Align options from the Arrange menu. You can align objects by their left, top, right, or bottom edge, or by their vertical or horizontal center. Most of the time, you can simply press ⌘j (macOS) or CTRLj (Windows) for the Auto Align command, which will align objects automatically based on whether they take up more vertical or horizontal space.
Distributing Objects
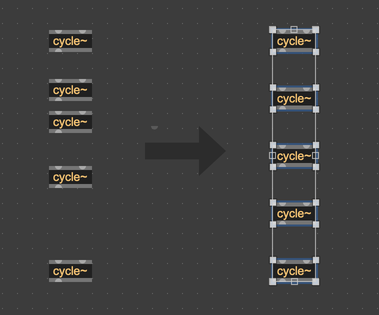
You can distribute objects, either vertically or horizontally, equalizing the space between each object in either direction. Select one of he Distribute options from the Arrange menu, or press shiftoption⌘h (macOS) or shiftoptionCTRLh (Windows) for horizontal spacing, or press shiftoption⌘v (macOS) or shiftoptionCTRLv (Windows) for vertical spacing. After distributing, adjustment handles will appear around the objects, which you can use for further equal-space adjustments.
Grouping Objects
If you want to maintain the spacing between objects, even if one of them is moved, you can assign them to a group by selecting Group Objects from the Arrange menu. When one memeber of a group is selected, the whole group will have a thin black border.
When you resize a group using the resize handles, Max will scale the spacing between objects, rather than the objects themselves.
Presentation Mode
Max is designed both as a visual programming environment and as a tool for building user interfaces. It's easy to design an interface simply by sizing and positioning objects as you'd like them to appear. However, when you want to perform with or demonstrate your patch, you might want to hide or reposition certain objects. By using Presentation Mode, you can configure a special appearance for your patch, showing just the most important objects.
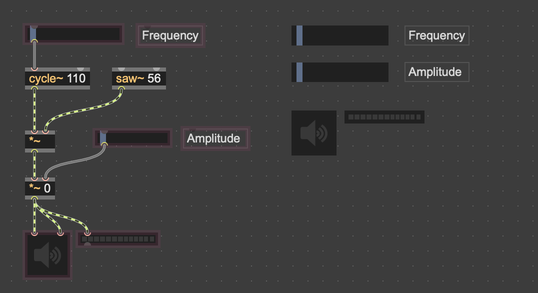
In order to add an object to Presentation Mode, select it and then choose Add to Presentation from the Object menu. Once added, the object will have a pink border. If you no longer want to see the object in Presentation Mode, select Remove from Presentation from the Object menu.
Adding an object to Presentation Mode simply enables the @presentation or Include in Presentation attribute.
You can toggle between Presentation Mode and Patching Mode by selecting the Presentation icon from the bottom toolbar, or by selecting Presentation from the View menu. An object can have a different size and position in Presentation Mode than in Patching Mode. When you toggle between the two, you will see objects animate to their new positions and sizes. In addition, you'll notice that the @patching_rect and @presentation_rect object attributes will be different, reflecting the two distinct positions for the object.
If you want a patcher to open in Presentation Mode by default, enabled the Open in Presentation attribute in the patcher inspector. This can be especially useful for bpatchers that you intend to use as high-level modules.
Object Ordering
Whenever you add a new object to your patcher, Max adds it on top of any existing objects. By selecting Send Backward or Send to Back from the Arrange menu, you can instead have other objects draw on top of the selcted object. The commands Bring Forward and Bring to Front instead cause an object to be rendered on top of other objects.

By making parts of some objects transparent, you can create compound UI object by layering existing objects in a clever way. You might find the attribute @ignoreclick useful in this case.
Foreground and Background
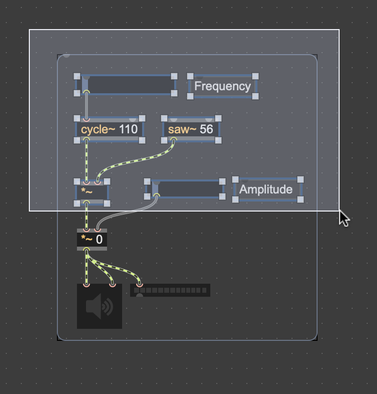
Max patchers provide a simplified implementation of a layering system, with a foreground and a background layer. The main goal of this system is to make it easier to separate documentation objects like comment and panel from logical objects that affect the behavior of the patcher. Objects in the background will always be rendered behind objects in the foreground, though both may appear in Presentation Mode.
By default, all objects are added to the foreground. You can add an object to the background by selecting Include in Background from the Arrange menu. You can hide and show the background and foreground by selecting Hide Background and Hide Foreground from the View menu. It can also be very useful to lock the background, which you can do by selecting Lock Background from the View menu. When the background is locked, objects in the background cannot be selected. This makes it possible to rearrange objects in the foregroudn without background objects getting in the way.
The Grid
To make it easier to lay out objects visually, you can enable the grid by selecting Grid from the View menu, or by clicking the Grid icon in the bottom toolbar. The grid is only visible when the patcher is in Edit mode, and will disappear when the patcher is locked.
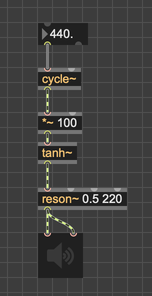
By default, the grid is simply a visual indicator, and objects will not be aligned to the grid while dragging. Choose Snap to Grid from the Arrange menu, and objects will always be alignd to the grid when you reposition them with the mouse. With this option enabled, objects will also snap to the grid when you resize them. While repositioning or resizing, you can hold down the ⌘ (macOS) or CTRL (Windows) key to temporarily disable snapping.
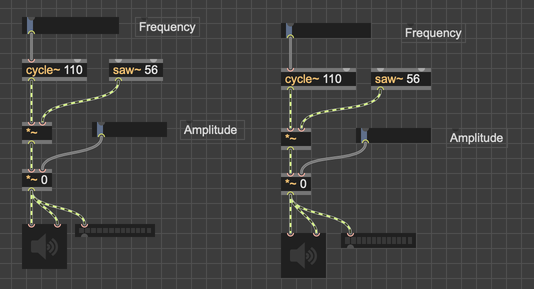
After enabling Snap to Grid, objects that were positioned without this option enabled may not be aligned to the grid, and will not be aligned automatically. To align existing objects to the grid, select Apply Grid > Apply Current Grid to Position or Apply Grid > Apply Current Grid to Position and Size from the Arrange menu.
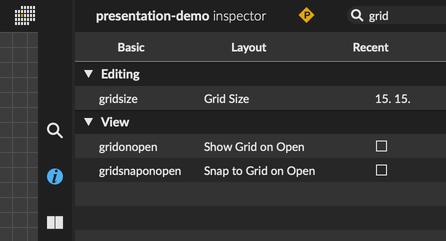
You can change the size of the grid using the Grid Size patcher attribute, visible from the patcher inspector.
Routing Patch Cords
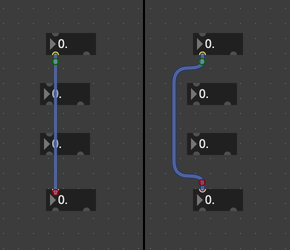
To keep your patcher looking clean and organized, you can create segmented patch cords, or you can have Max route the patch cords for you automatically. Routed patch cords are segmented in a way that tries to use only right angles while also avoiding intersecting other objects.
Changing Colors
You can change the appearance of most parts of the patcher, including the color of objects, patch cords, and the patcher background. Color changes can be applied individually, or as a style across the whole patch.
- Change the color and appearance of the patcher itself using the patcher inspector.
- Change the appearance of objects by adjusting each object's individual attributes, by setting a style for each object, or by setting a style for the patcher.
- You can also change the color of patch cords in your patcher.
Zooming
You can adjust the zoom level of your patcher, either zooming in to make more precise adjustments, or zooming out to see more objects at once.
- Find a precise zoom level using the Zoom control in the top toolbar.
- Select Zoom In from the View menu to zoom in, or Zoom Out from the View menu to zoom out.
- Press z to zoom in, or shiftz to zoom out.
- Use the two finger "pinch" gesture to zoom in or out with precise control.
Multiple Views
It's possible to open multiple views of the same patcher. This could let you view a patcher in patching and presentation mode at the same time, or view a patch at two different zoom levels at once.
Create a new view of the current patcher using the Patcher Window icon in the Bottom Toolbar.
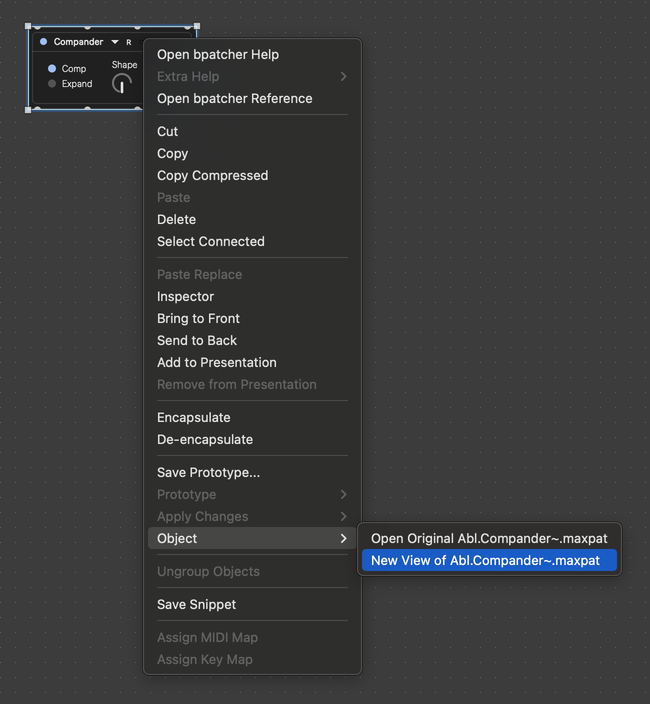
You can also create a new view of a bpatcher by right-clicking the bpatcher and selecting Object > New View from the contextual menu.
Patcher Attributes
Behind the scenes, the patcher is a Max object like any other, and many aspects of the patcher can be controlled with attributes.
- Whether the patcher opens in presentation mode
- The color of the patcher background
- The spacing of the grid
- Whether the toolbars are pinned or unpinned
Access these patcher attributes by using the patcher inspector in the Inspector sidebar.
Key Commands
As you patch, you'll find there are several things that you'll do very frequently:
- Creating a new object
- Adding a comment
- Showing a highlight
- Viewing a list of recently created objects
- Adding a button, slider, or toggle
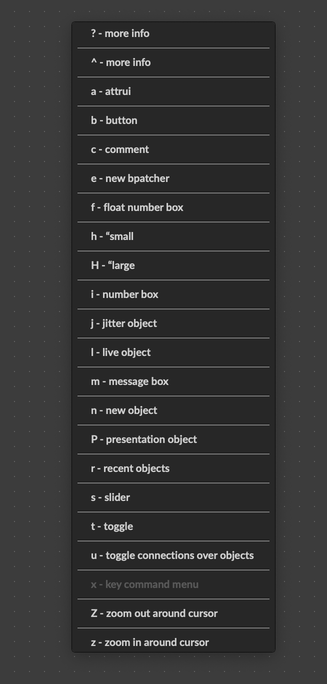
All of these common actions have a Key Command associated with them. You can press a single keyboard key (n to make a new object, r to view recent objects, etc.) to perform the associated action. Most importantly, you can press x at any time to view a list of all available key commands.
Patching Mechanics
The Max patching interface supports a handful of useful shortcuts called Patching Mechanics. These are enabled by default, and you can toggle them on and off using the Enable Patching Mechanics preference in Max's preferences. These shortcuts make it easier to work with your patcher by reducing the amount of precise clicking needed to create and arrange objects. See Patching Mechanics for more information.
Finding Objects and Text
Select Find... from the Edit menu to search for text in your patcher. Max will display a search interface at the top of your patcher view.
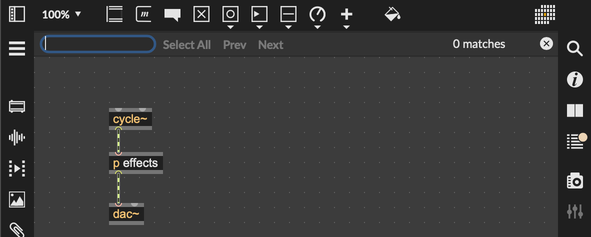
As you enter your search text, Max will show you all of the objects whose text matches your query. It can also identify objects that do not match in the current patcher, but which match in some subpatcher. Click on the in a subpatcher text in the search interface to reveal the subpatcher with the matching object.

Patching Margin
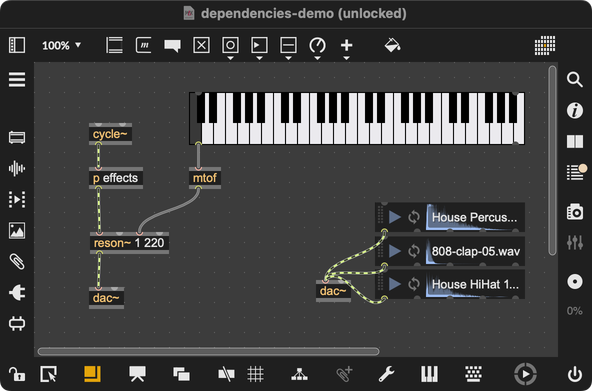
By default, Max will only allow scrolling only until the object in the bottom-right of your patcher is just in view. That means that even if the current view is full of objects, you won't be able to scroll to reveal more empty space.
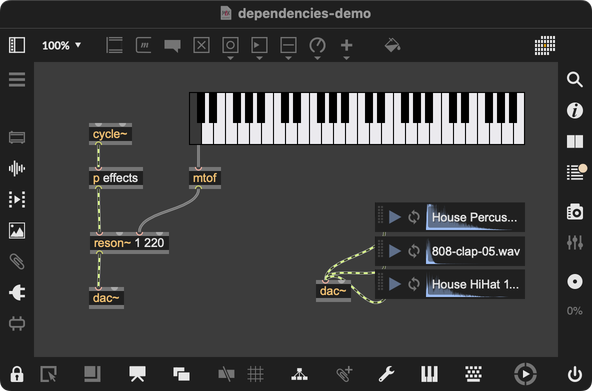
You might prefer to allow scrolling no matter what, so that you can always scroll in order to have more empty space to patch in. Enable the Patching Margin icon in the bottom toolbar in order to add additional space to the patcher view to the bottom and right.
Reinitialize
You can bring a patcher back to an initial state by selecting Reinitialize from the Edit menu. This has two effects:
- Sends a
loadbangto the patcher, triggering any loadbang objects in the patcher. - Resets all parameters to their initial value.
Reinitialize works especially well with patchers that take advantage of parameter-aware objects